TABLE OF CONTENTS
Introduction
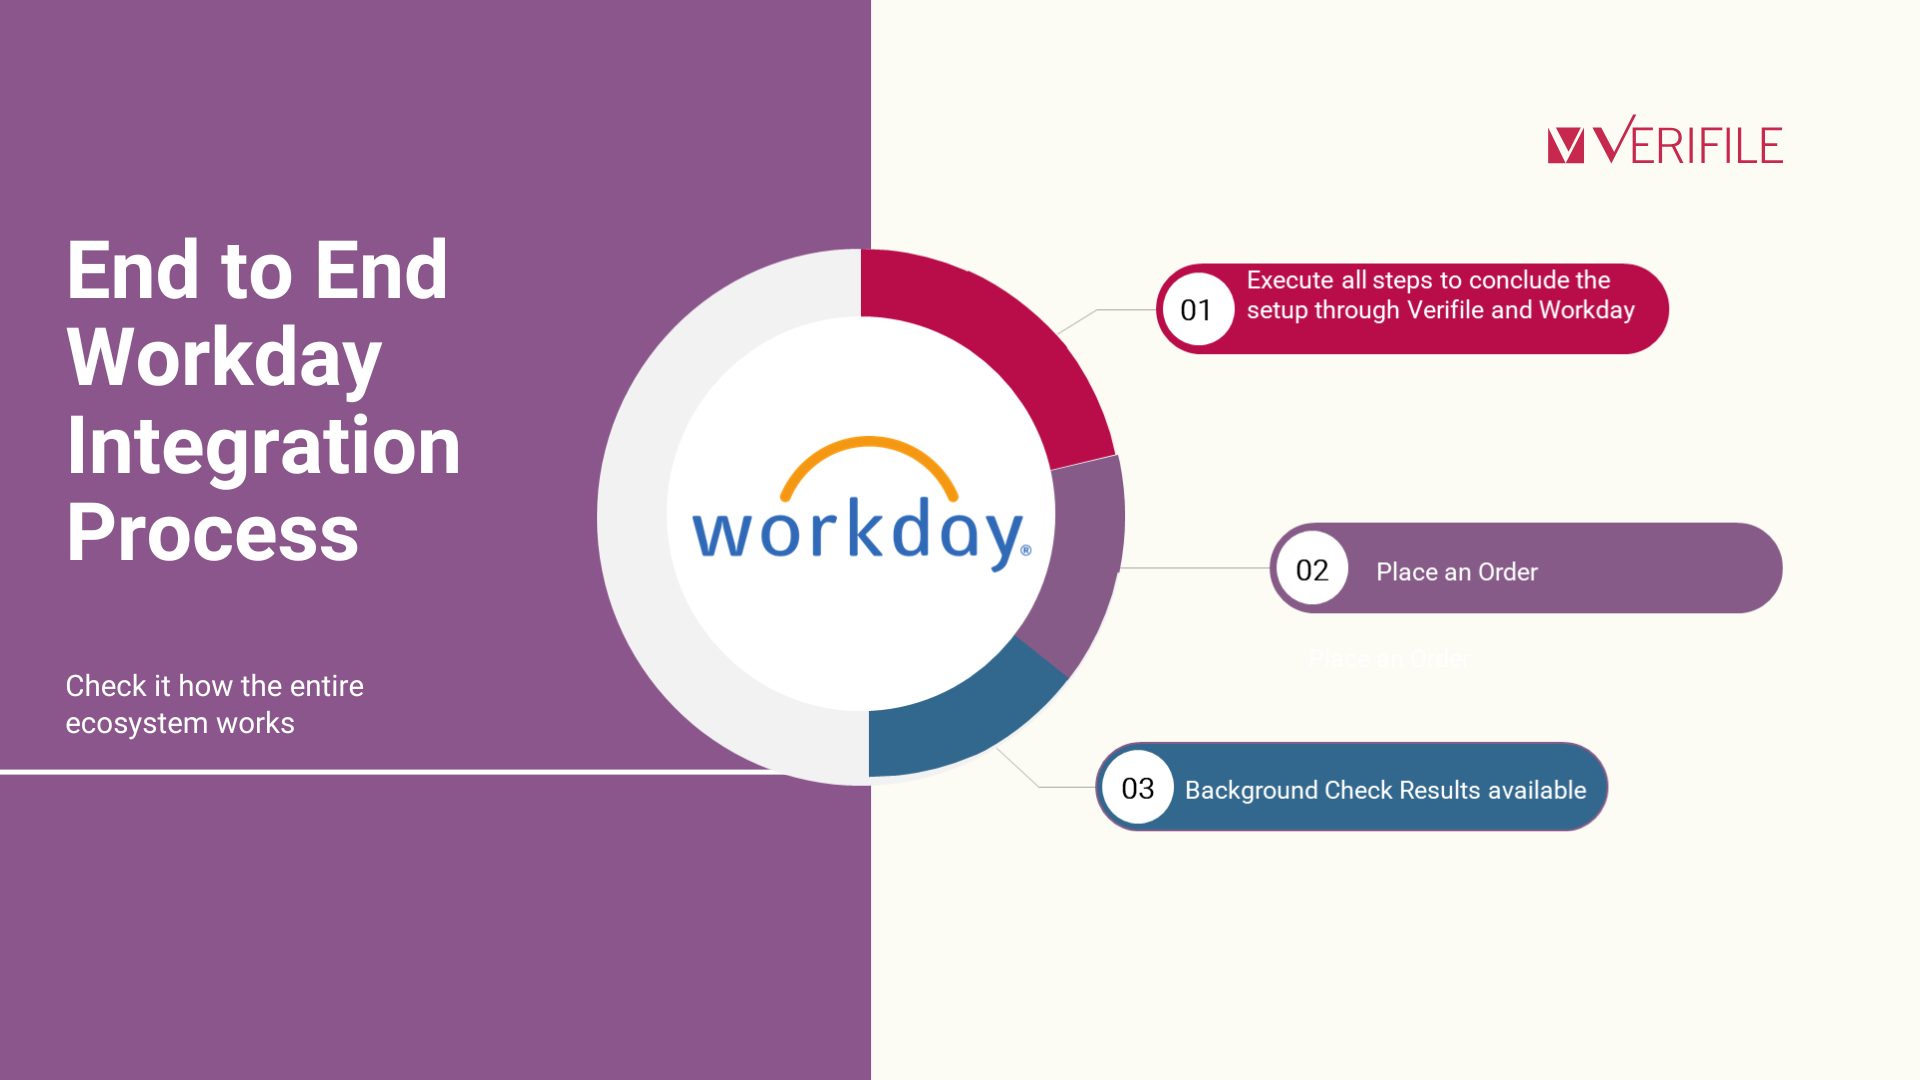
- Integration Set-up explains the steps to set up the integration.
- Place Order outlines the order creation journey, tracking progress and necessary adjustments.
- Background Check Results covers the end of the process, including accessing the final report.
[Click images to expand]
How to set up
| Step | Expected Result |
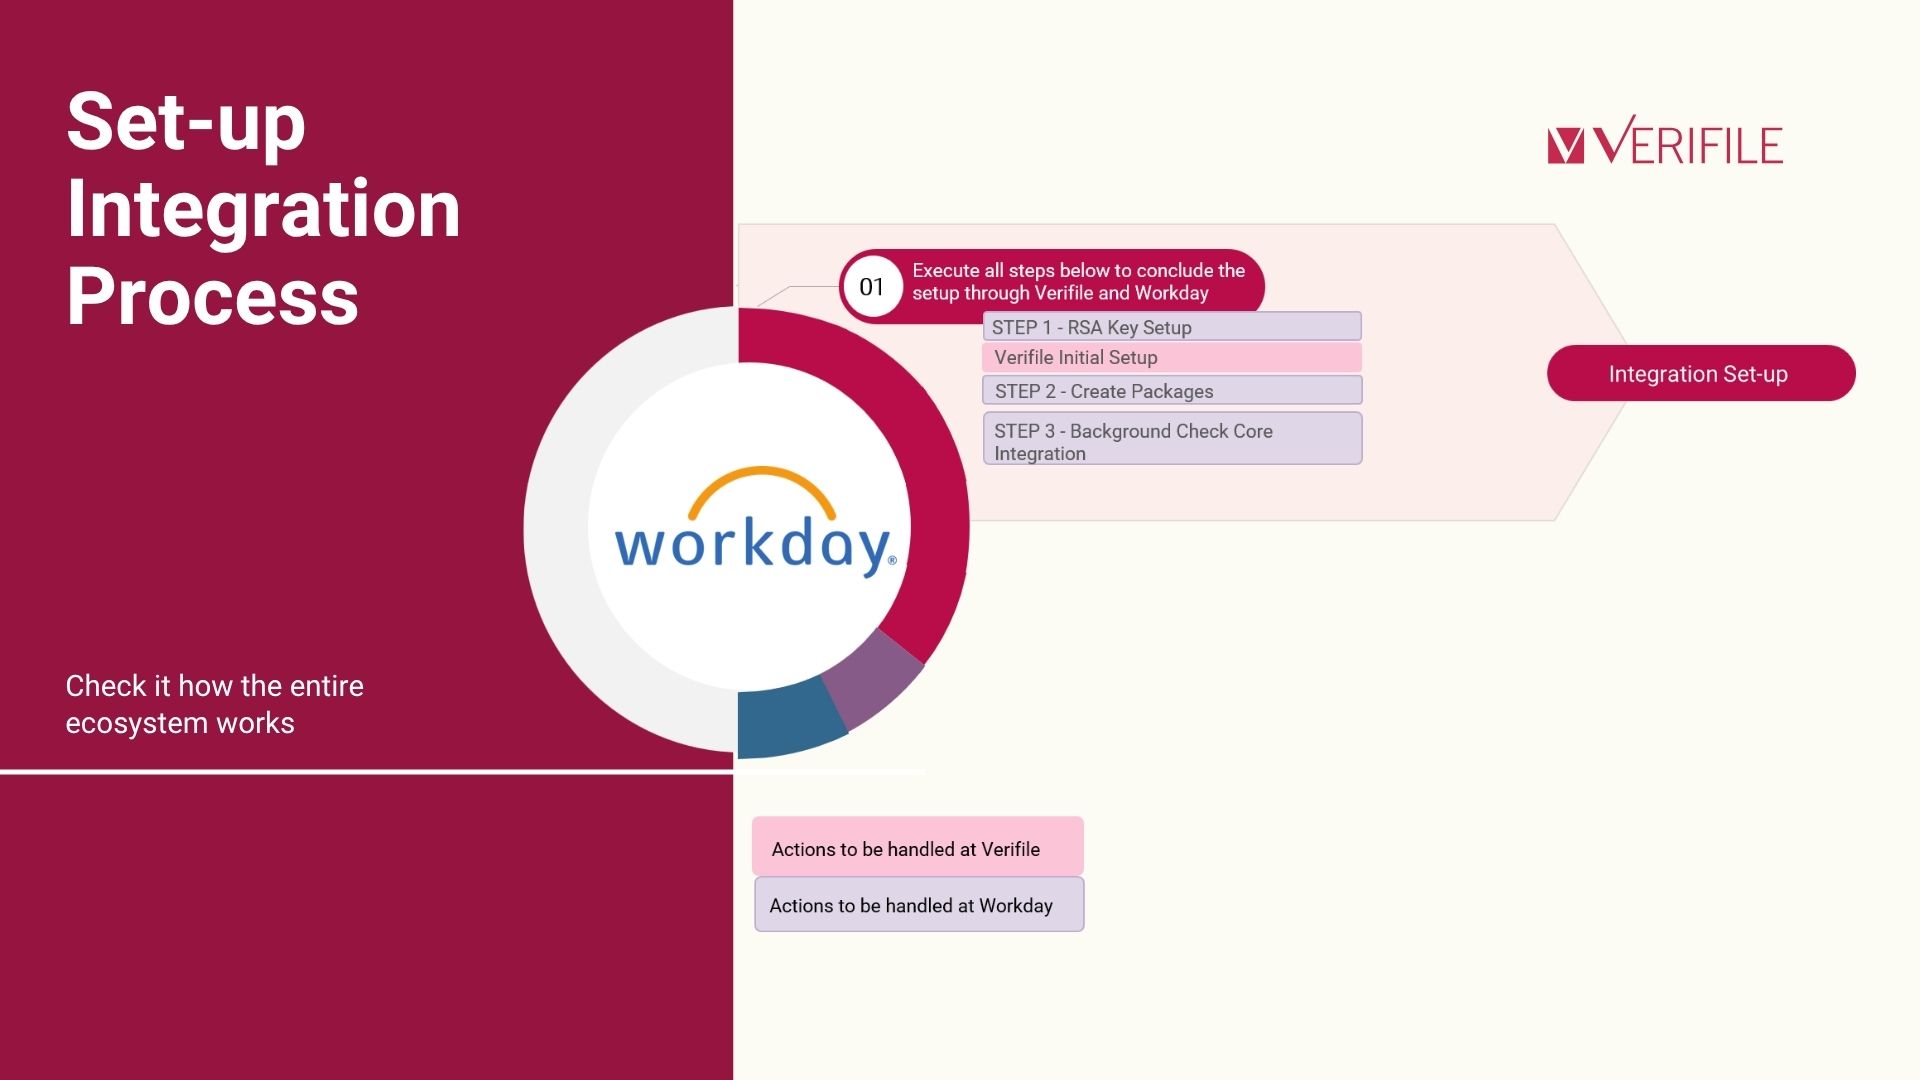
| STEP 1: RSA Setup | Establish the secure authentication between Workday and Verifile, ensuring that data can be exchanged safely between both systems. |
| STEP 2: Create Packages - Use credentials provided by Verifile | Use the credentials provided by Verifile to retrieve and configure the background screening packages that will be available for ordering from Workday. |
| STEP 3: Background Check Core | Configure the Workday background check framework, including when screenings are initiated, how requests are sent to Verifile, and how statuses and results are returned and displayed within Workday. |
Bellow you will find information on the steps to set up the integration:
1. RSA Key Setup
- Follow the guide shown here: Create a RSA-SSH Formatted Key for use with the SFTP key authentication.
---- BEGIN SSH2 PUBLIC KEY ----

AAAAB3NzaC1yc2EAAAADAQABAAABAQCDFhGHa2D+aIyDDFLTrIo6JltlKKXuWLFjMUbjGlx8

YbwYnrjorb17D+UDfwzCuxOQ/H6puRT2aNMN1rWPg/V82wKfQ9DlztxhKq8FcnKdAESnuGDt

+6OidKzsoXz6ExczgiaubvrplxdHQ0TQrqZOYGdC/1KisrXFBh+FX13DQ9FLJn6wpPv69kV2

bSCub9YjXNfhjm+0fWPuahwbTENXHZUYuWpXYNt92NtBgAjM0h54tET28c8zmuW+dSBAh7id

CAqqpDt30uPvfg79FJ1/9VYeMxD7MKgRDFzeK8ixPWXXLs2R/rXRq95e9FMtzW5M7k1jE2yd

hk/uIKSv6/U1

---- END SSH2 PUBLIC KEY ----
Send Your Details to Verifile via PrivateBin
PrivateBin is a free website that lets you send messages privately and securely. The message disappears after a short time, and only those with the link can view it.
- Go to the PrivateBin website and type your setup information into the large empty box in the middle of the page.
- At the "Expires" option, select 3 days. This means how long the message should stay online. After this time, the message will automatically disappear.
- Click on the “Create” option. This creates your message and encrypts it (makes it secure).
- Please copy the link that appears; it is the only way to see the message.
- Share the link with the Verifile Tech Support Team. Only our team with the link can read the message. Safely and easily.
Verifile initial setup
2. Import Background Check Packages
Adding Package EIB
- Open the Workday system and type 'Create EIB' into the top search bar.
- Select the 'Create EIB' task.
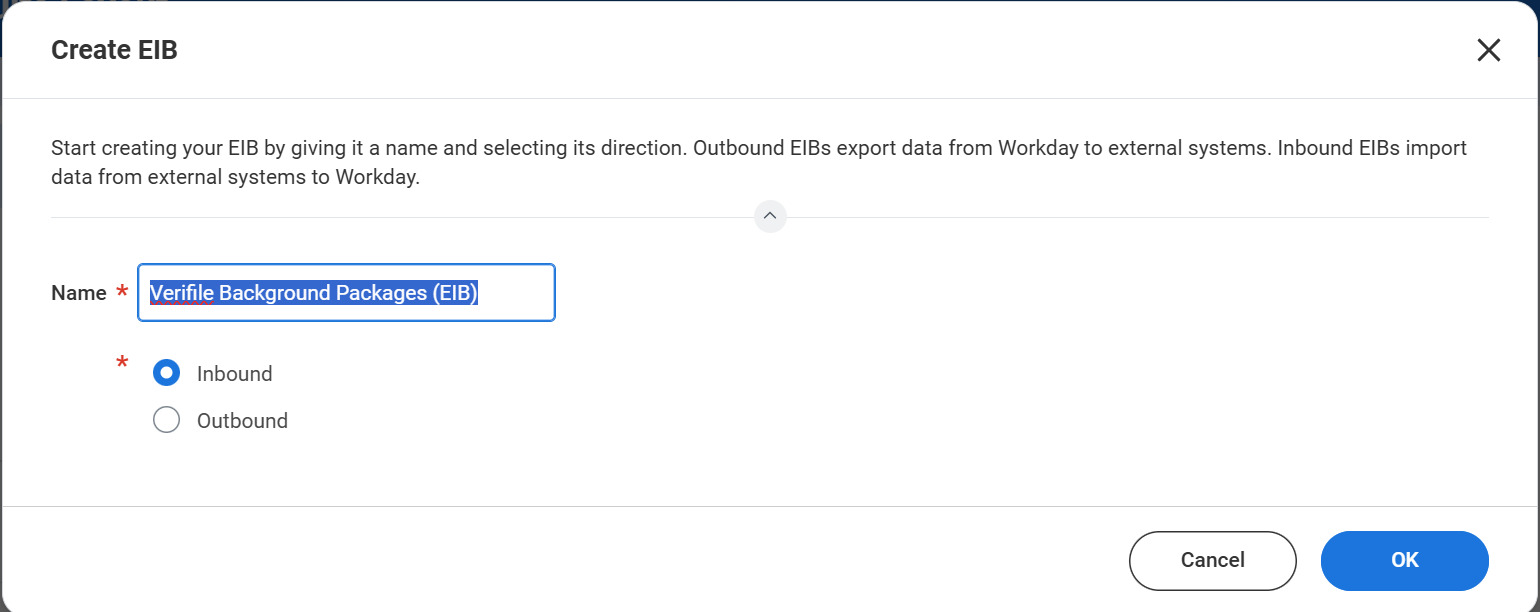
- Give the EIB an appropriate name, such as 'Verifile Background Packages (EIB)', and select 'Inbound' as the direction of the EIB.
- Click 'Next' on the 'General Settings' page.
- On the Get Data page:
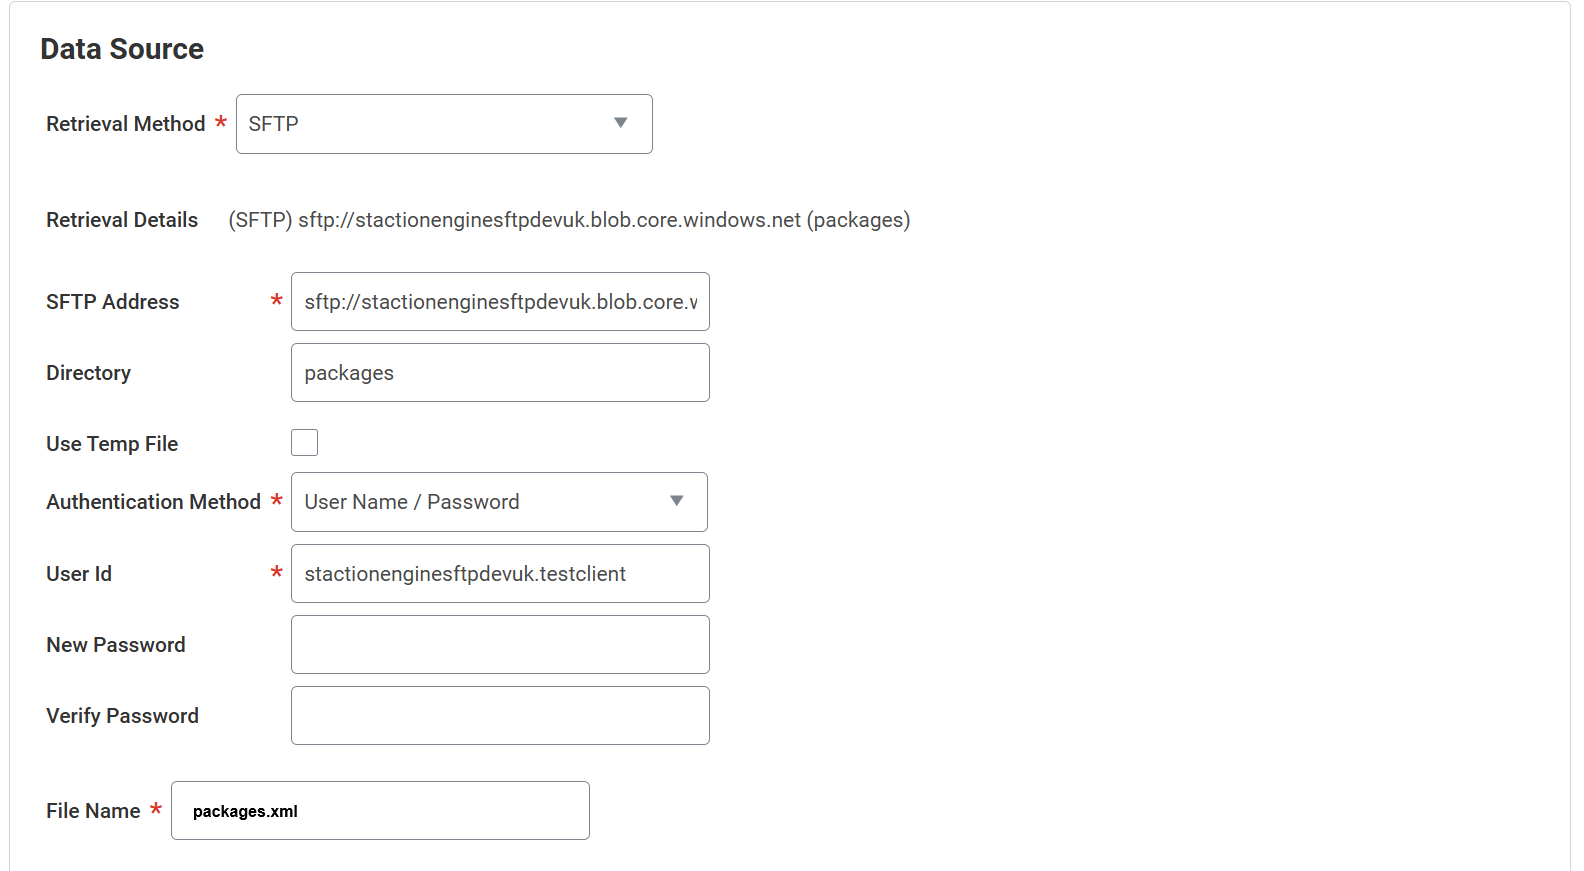
- Select 'SFTP' for the Retrieval Method
- Add 'sftp://' and the SFTP server that you have been provided as the SFTP address
- Add the User ID and Password supplied by Verifile.
- Tick 'Delete After Retrieval' in advanced settings.
- Set the Directory and File name as shown below.
- On the Transform tab, select 'Template Model' as the transformation type and use the 'Put Background Check Package' as the Template Model. Use template model V45.0; no adjustments are needed.
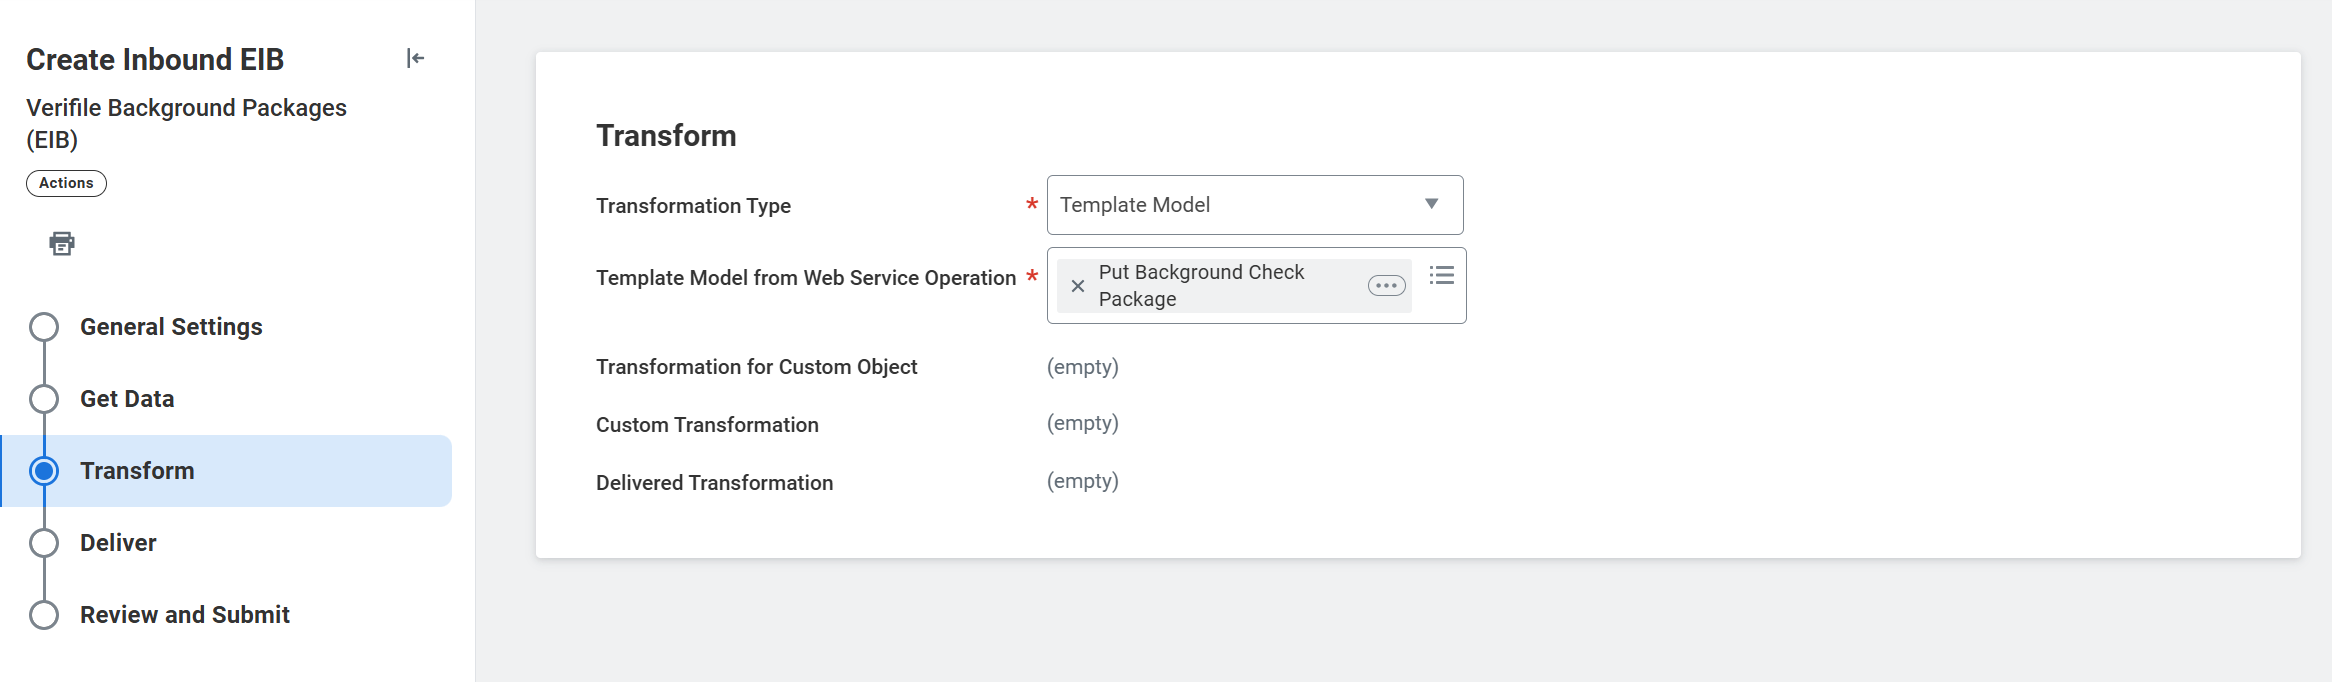
- Click 'Next' on the Deliver tab and 'OK' on the Review and Submit tab.
Note: Workday has a 50-character limit on package names.
Running EIB
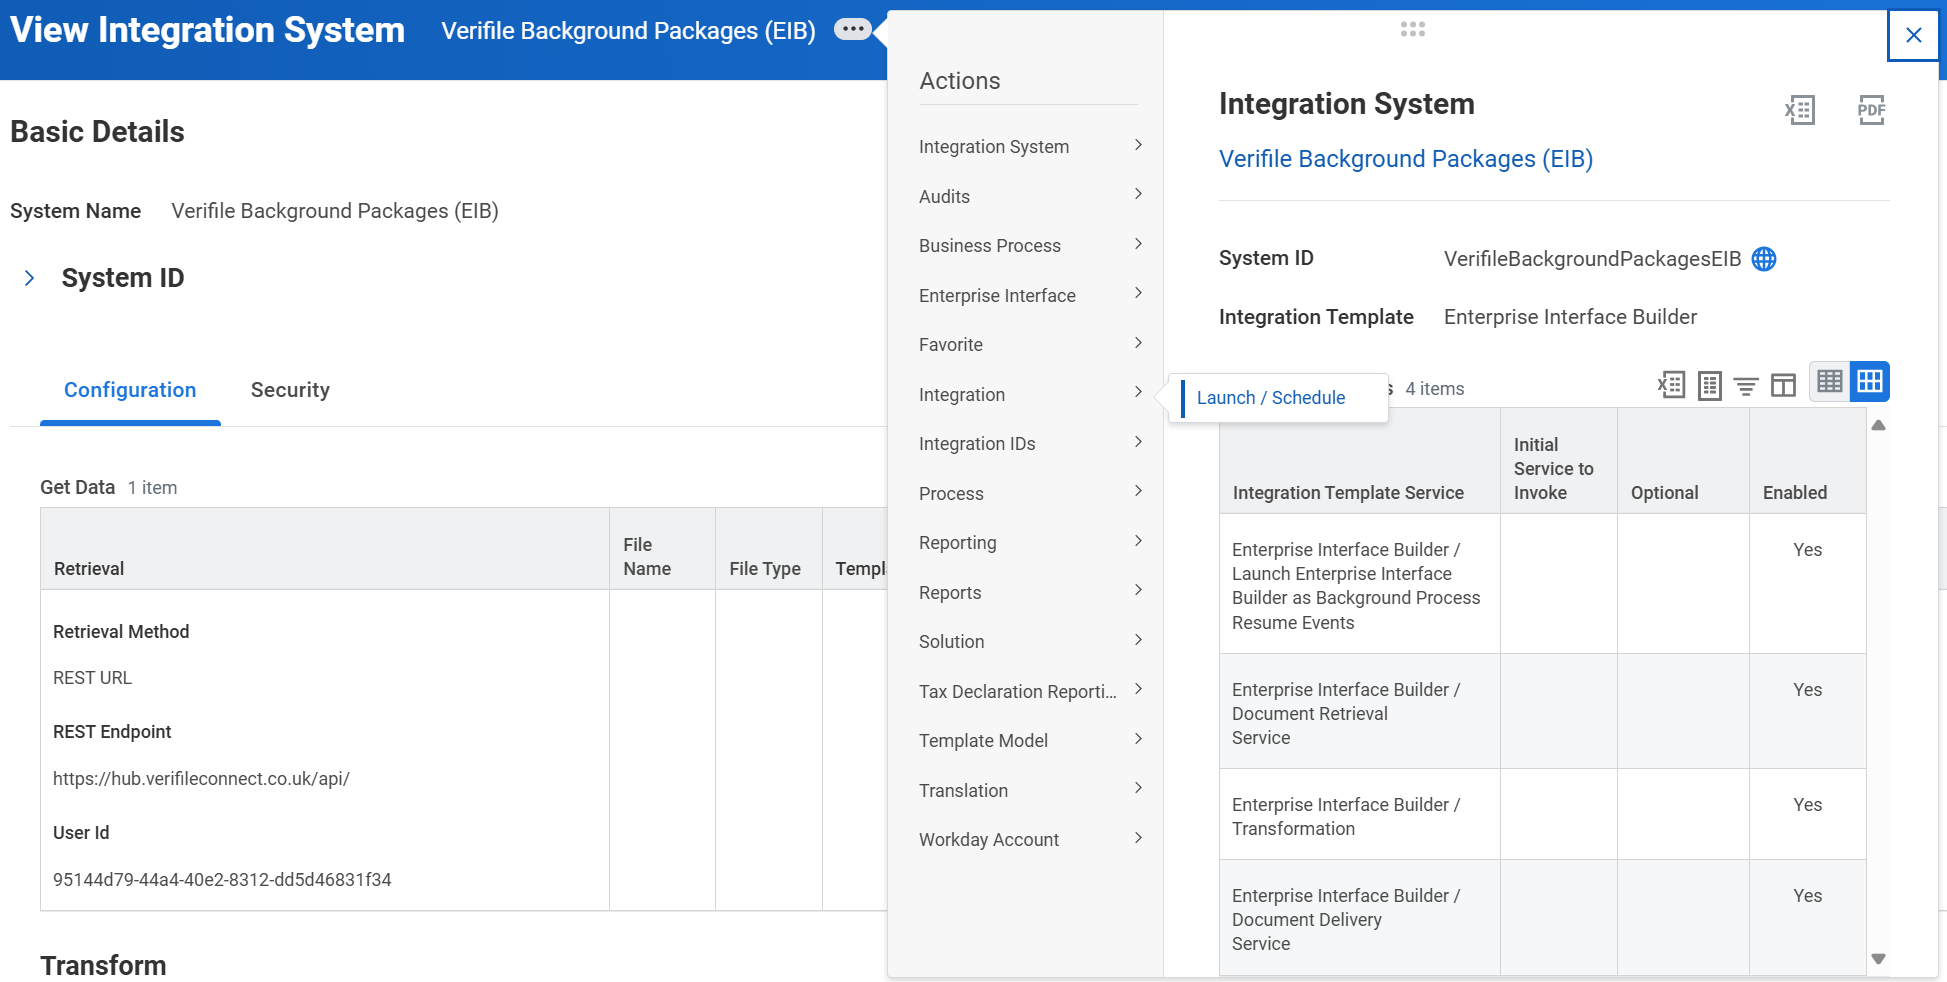
Outdated Template Model Alert

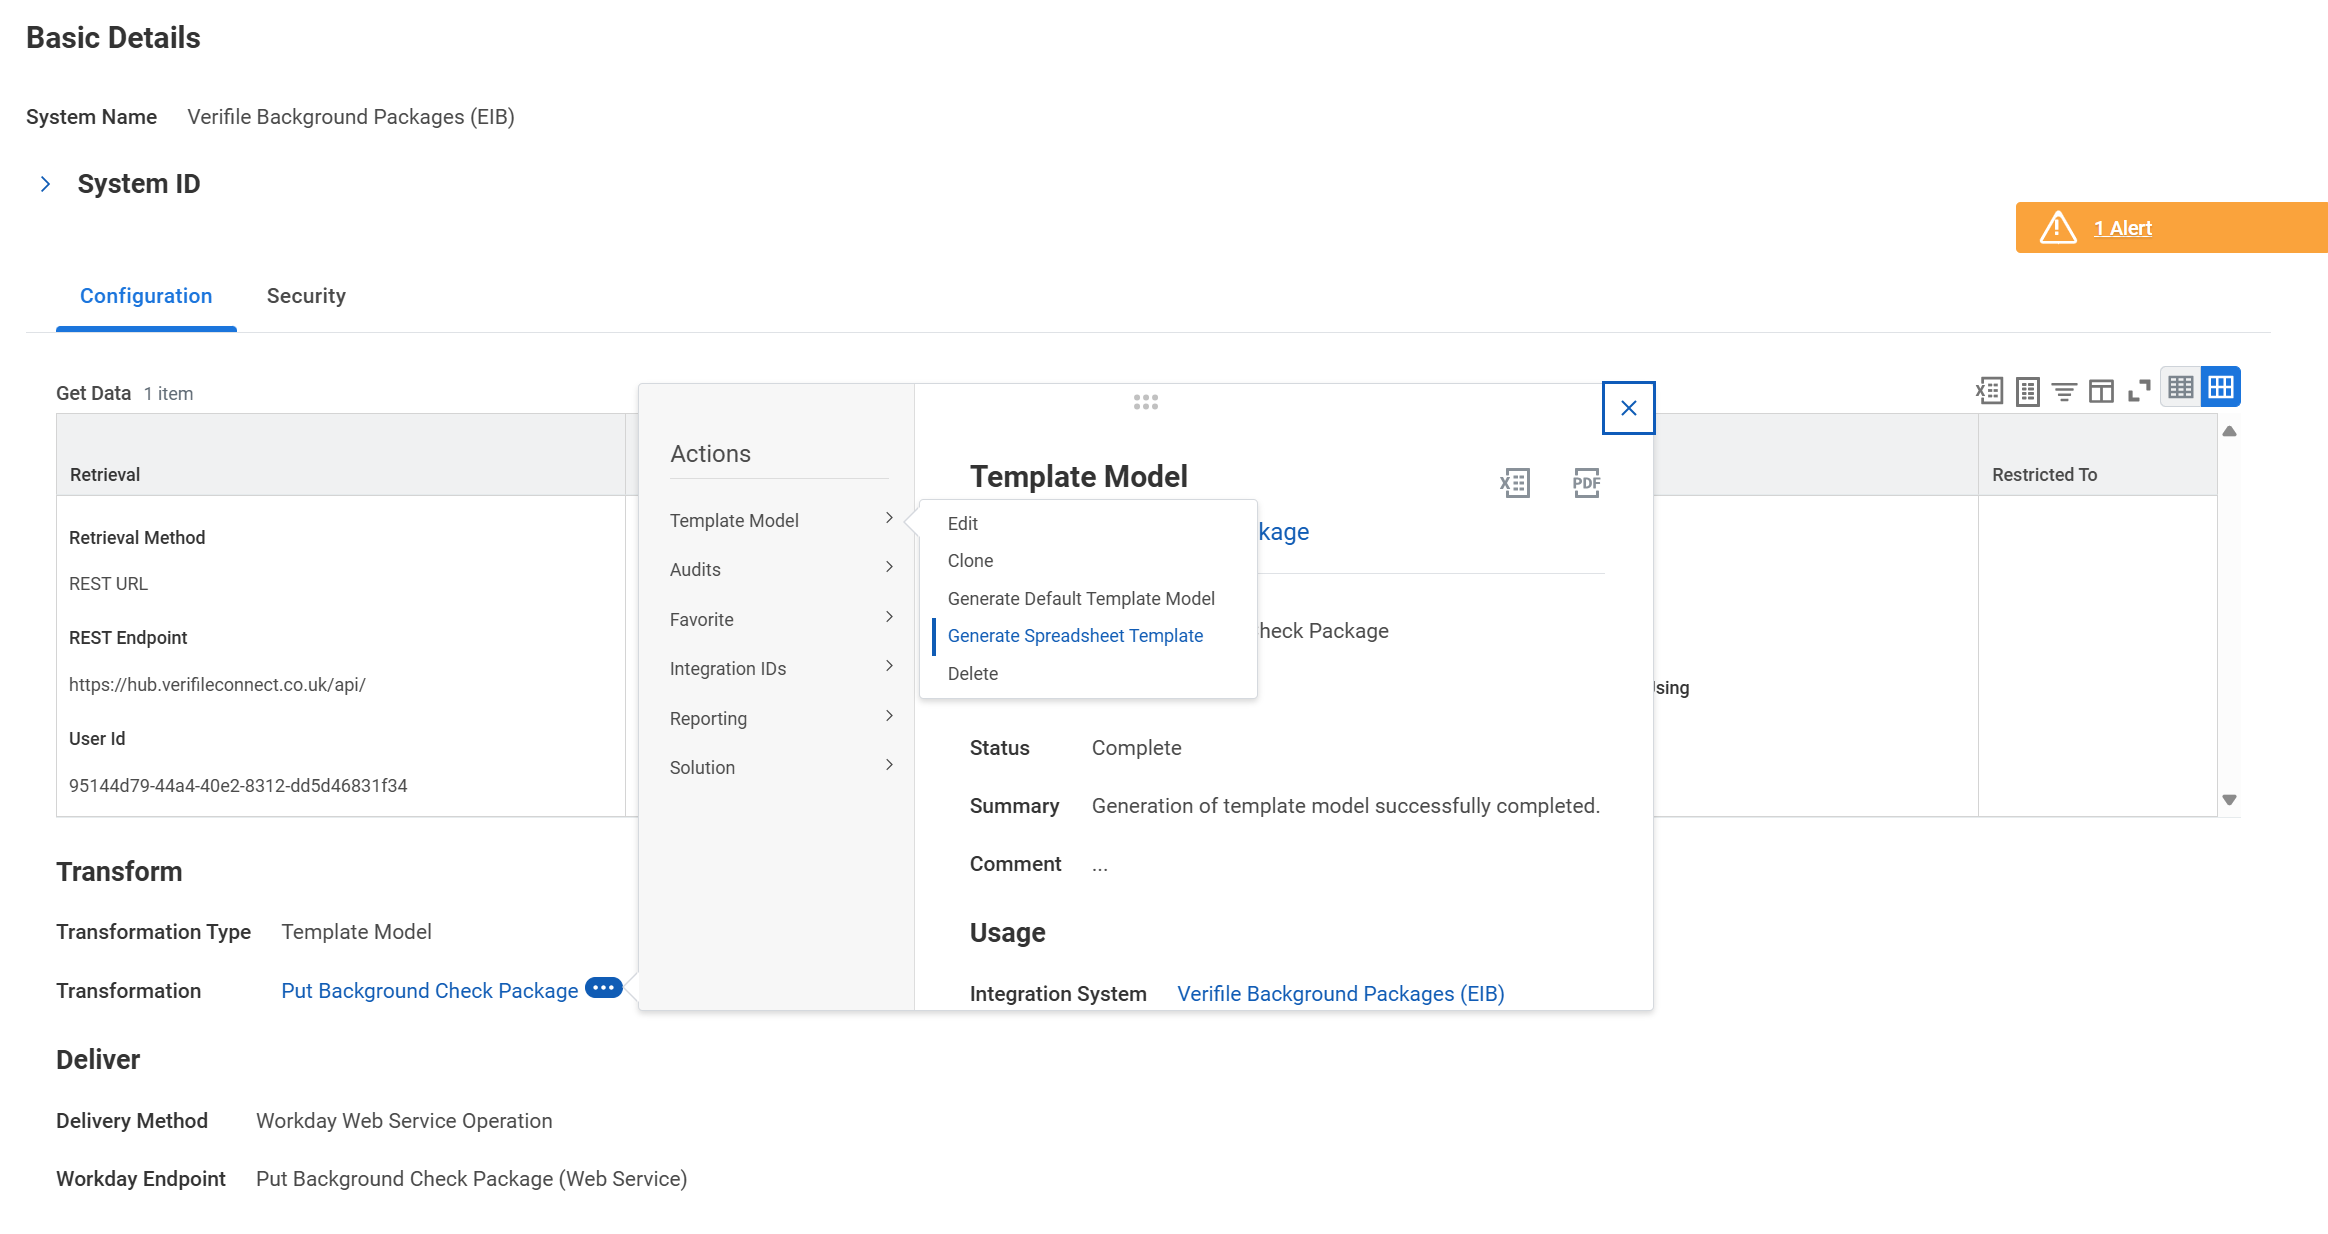
3. Background Check Core Integration
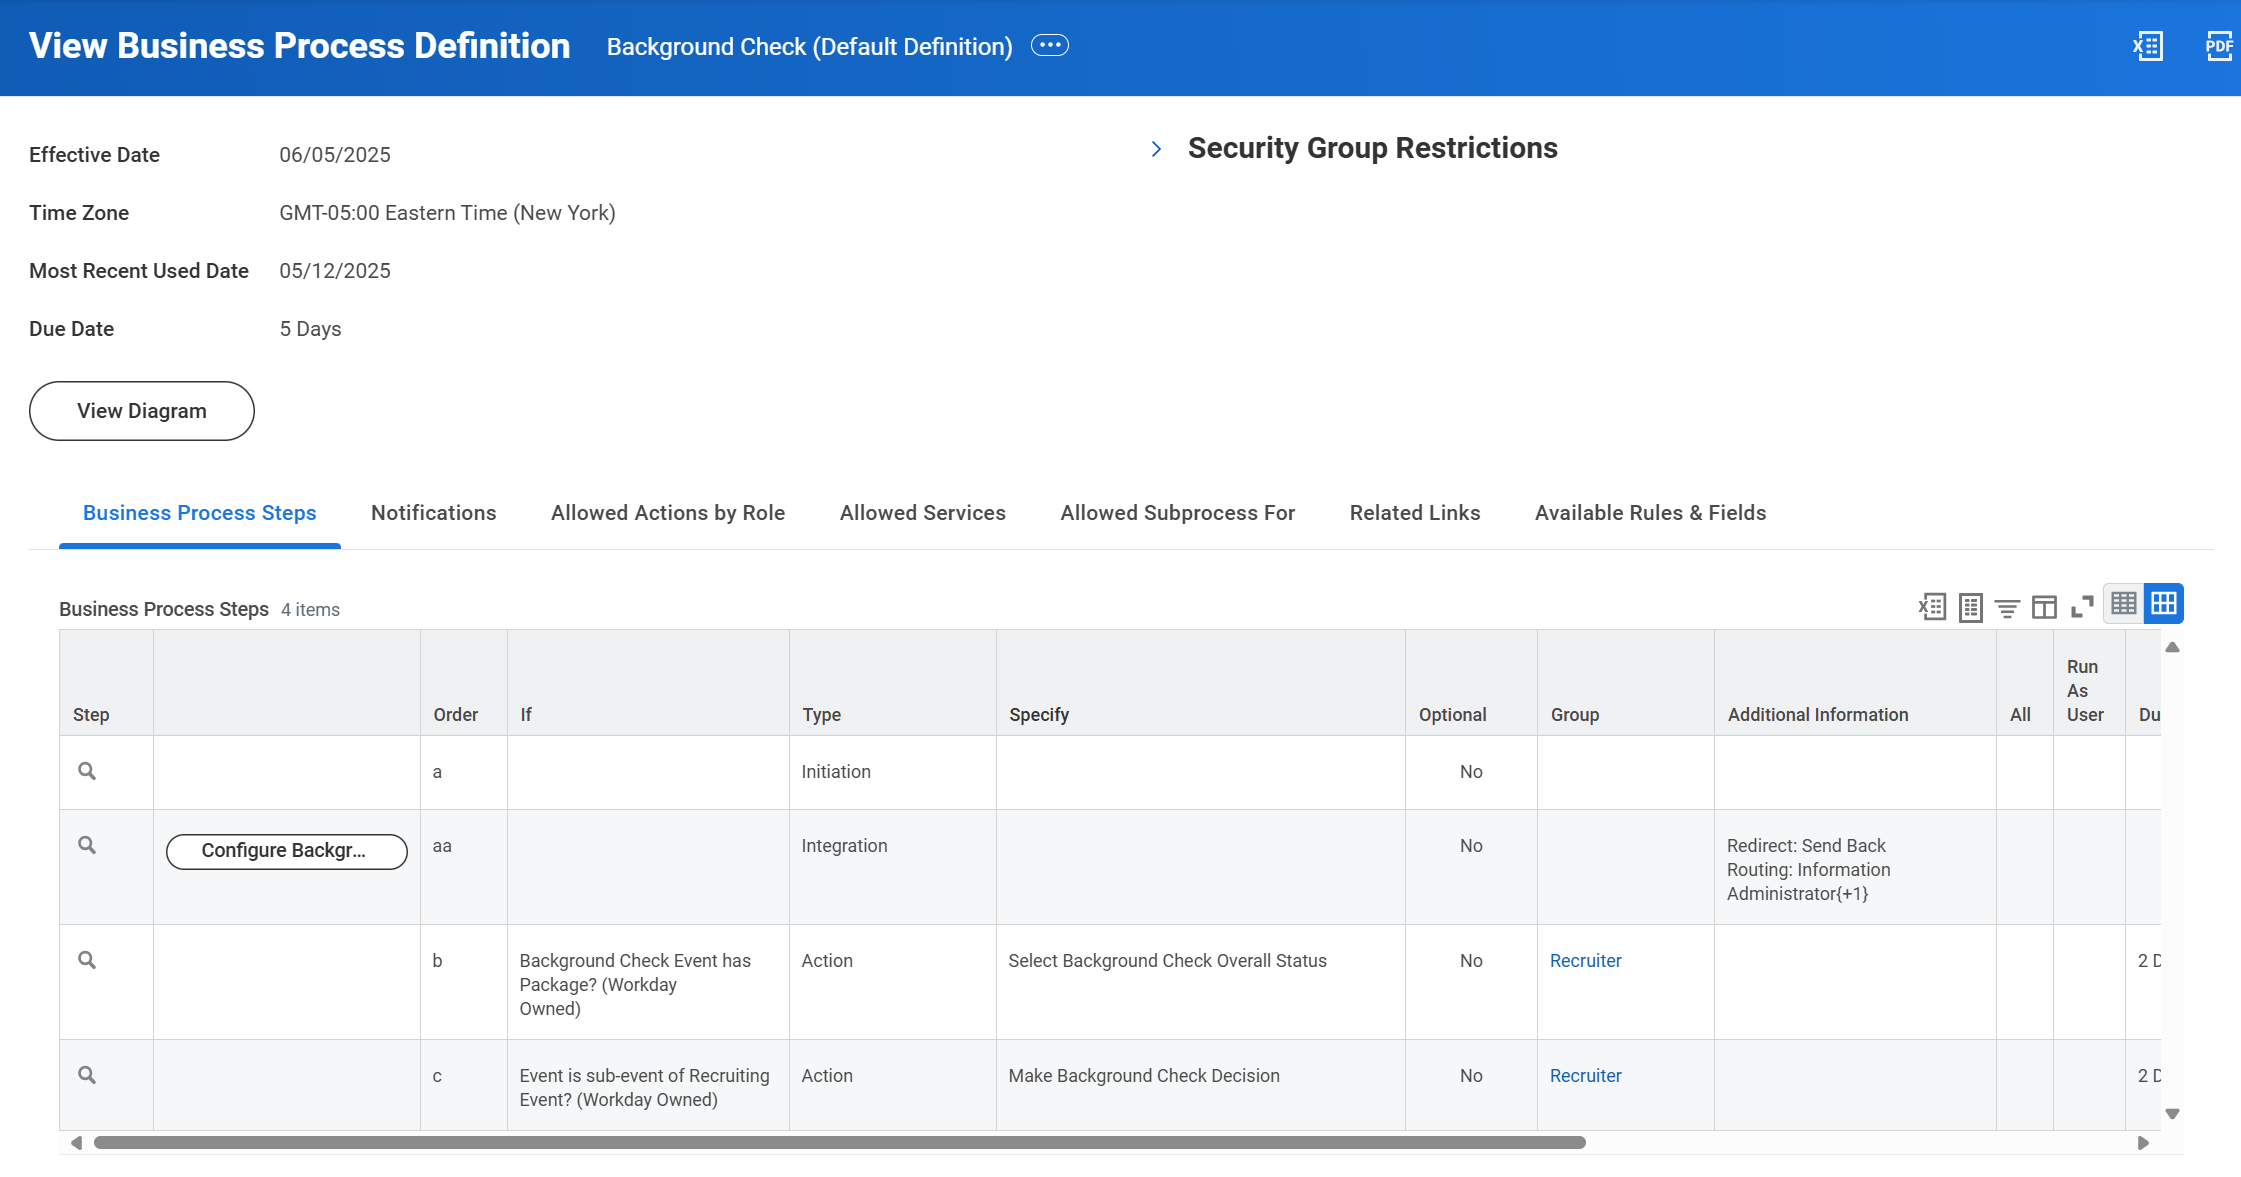
- Configure the Core Connector: Background Check Order Outbound integration.
- In the (Optional) integration services, configure Core Connector: Background Check Outbound Delivery
- Follow the instructions Set Up Integration Delivery
a. On step 6 of the Workday documentation Set Up Integration Delivery, an option is available to add a delivery method. Use the details below to connect the background core outbound service into Verifile.- Select 'SFTP' for the Retrieval Method
- Add 'sftp://' and the sftp server that you have been provided as the SFTP address
- Add the User Id and Password provided by Verifile.
- Set the directory and file path as shown below
- Select Temp files.
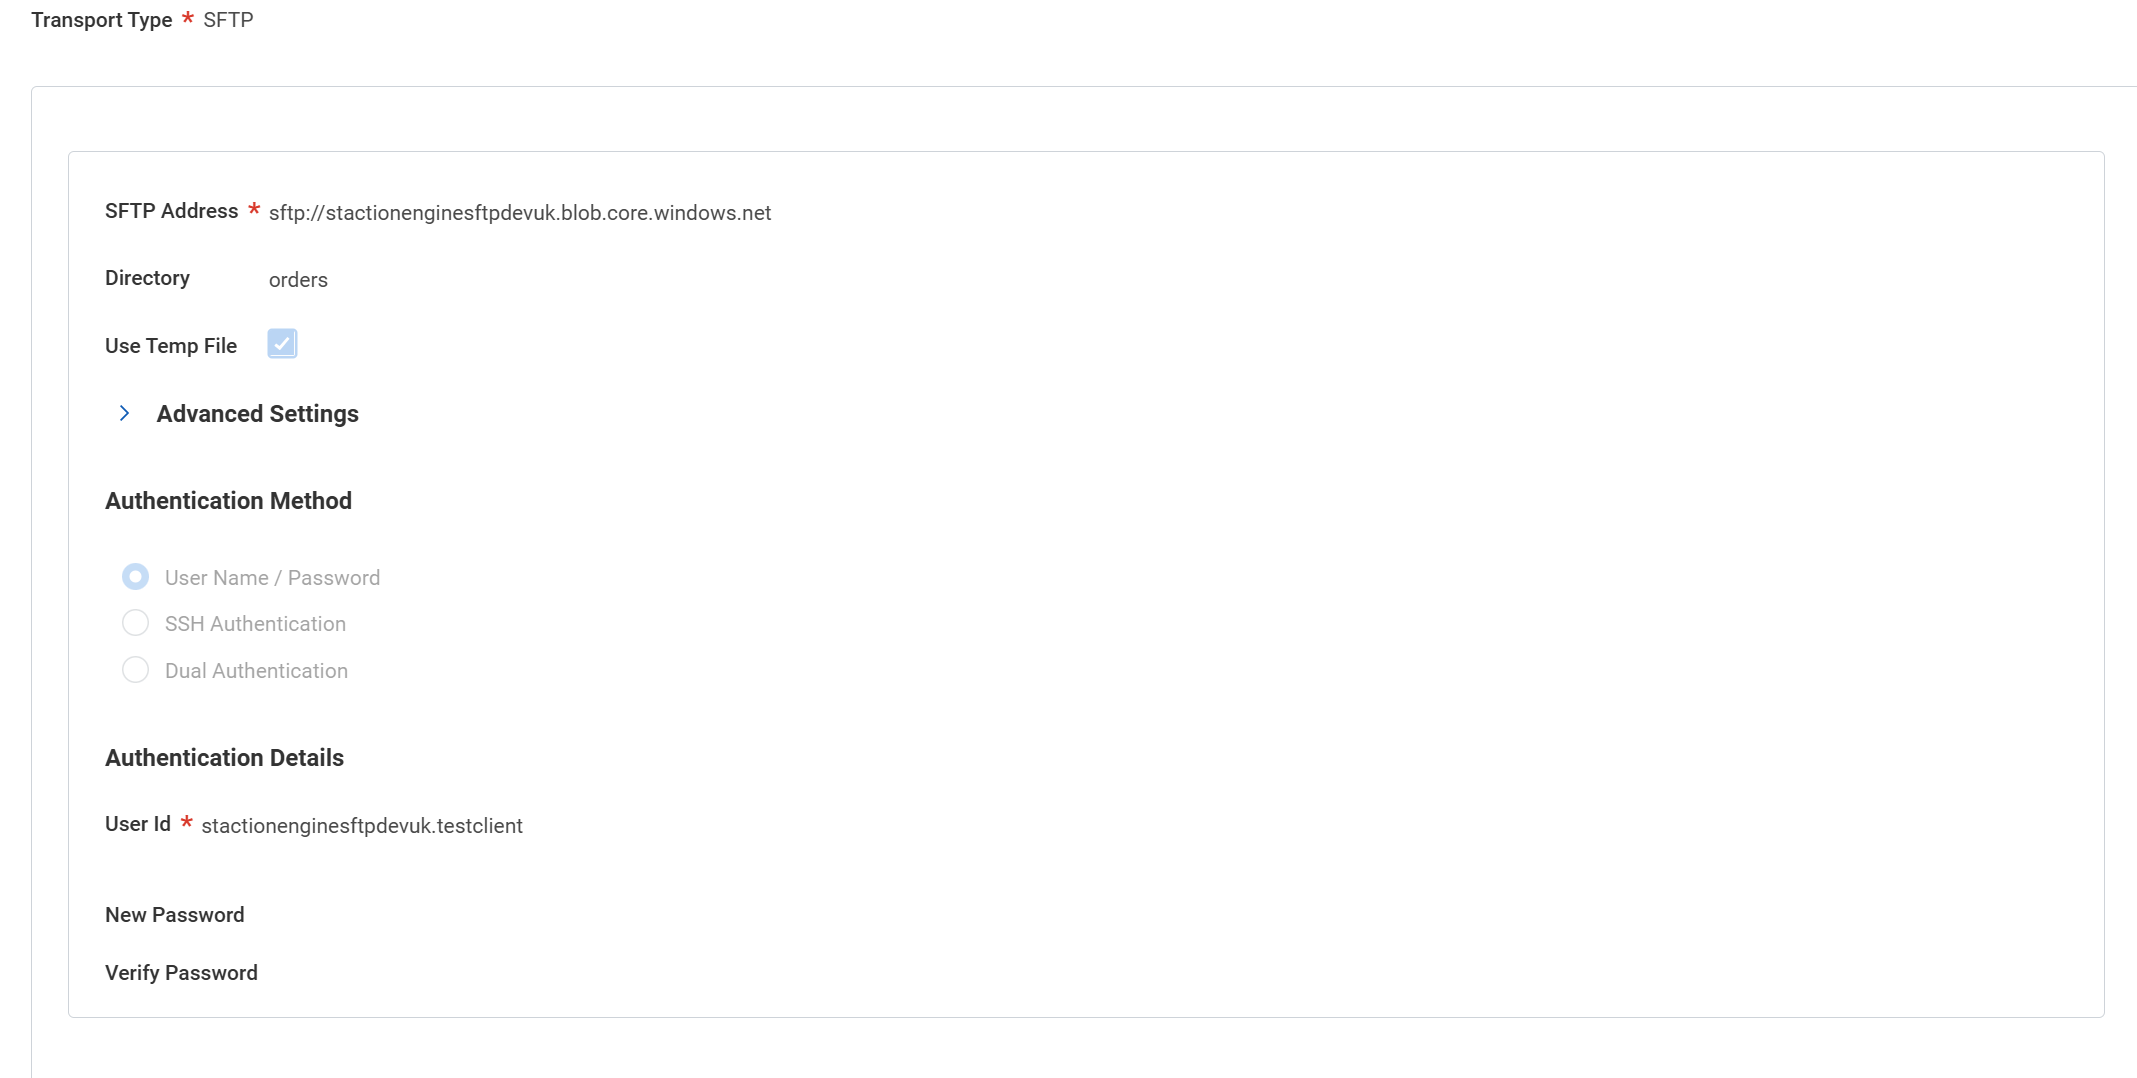
This is the integration business process definition with added delivery: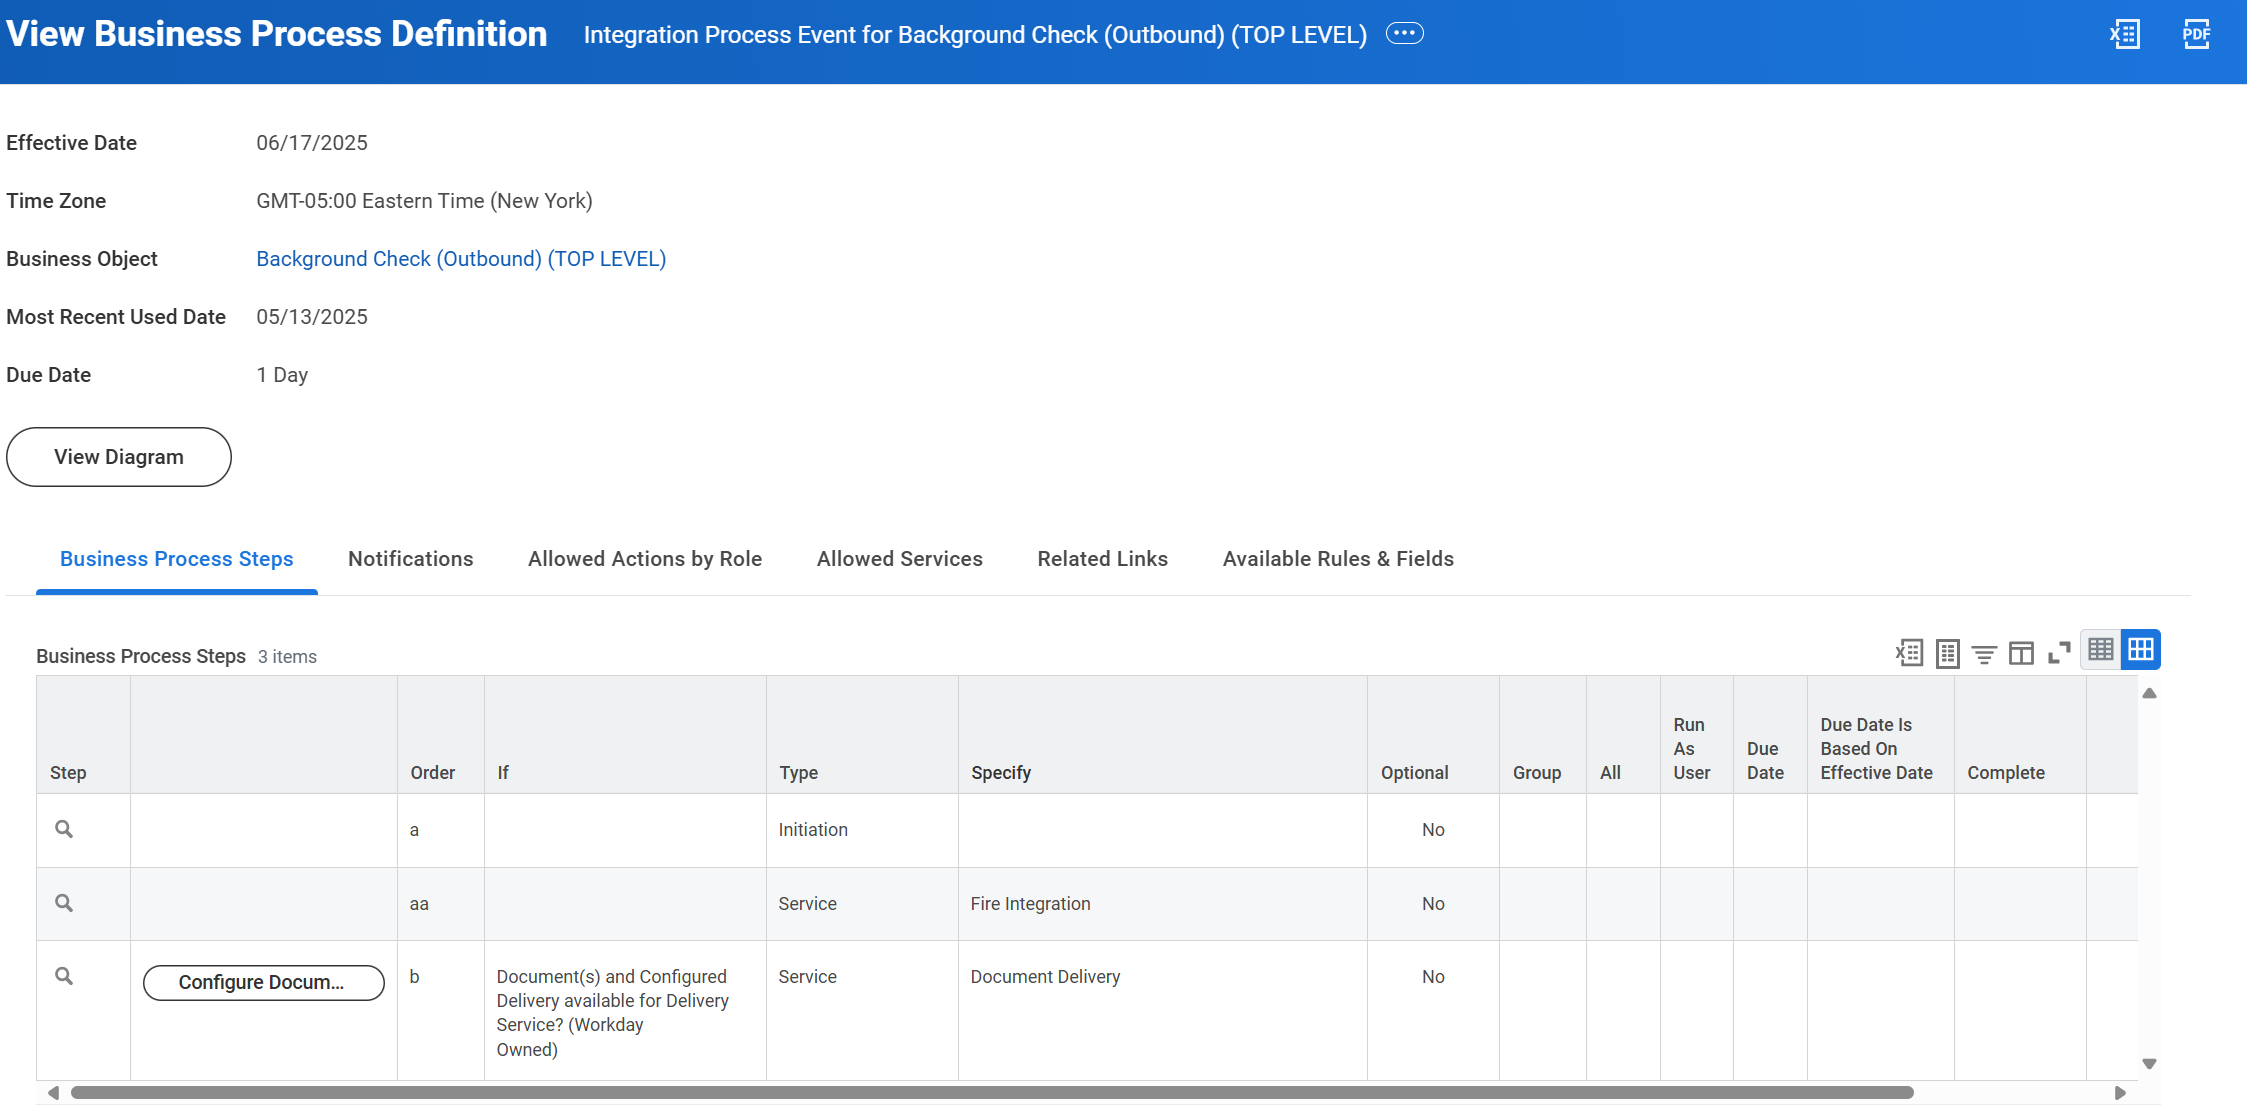
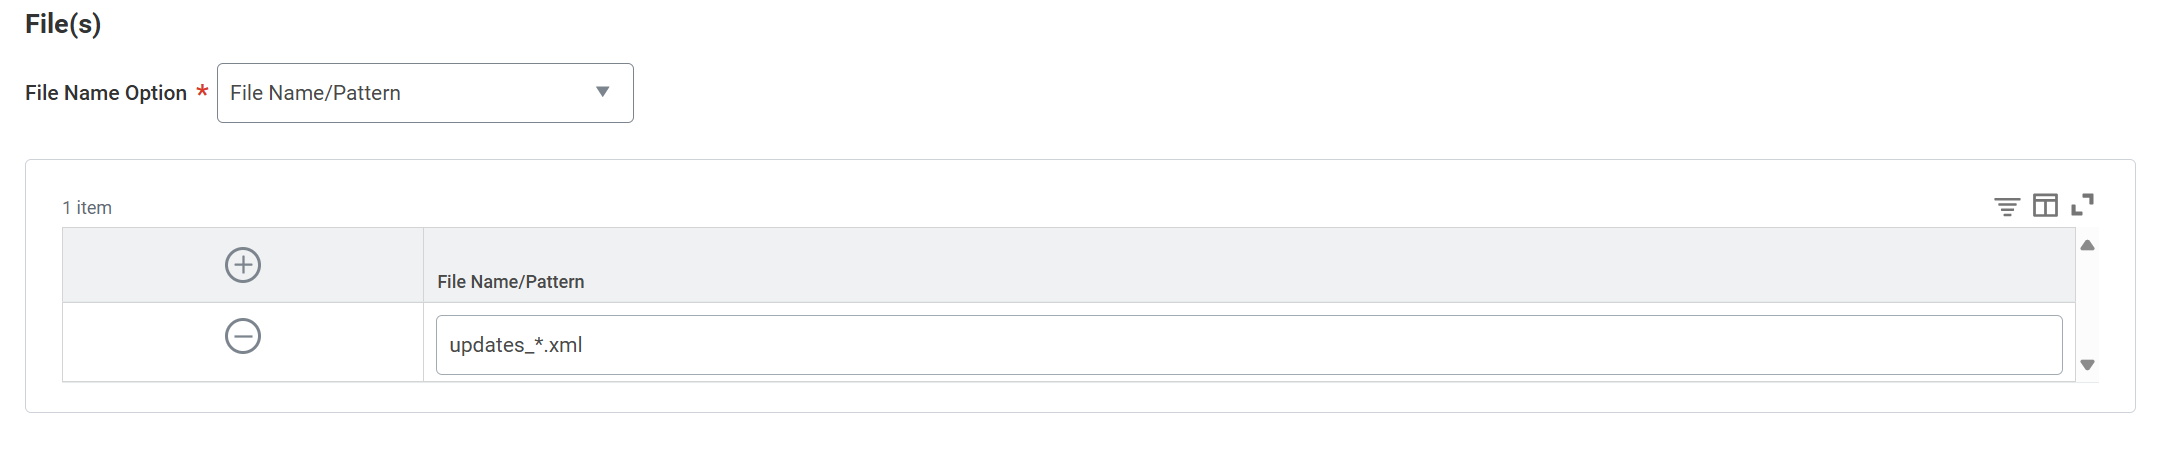
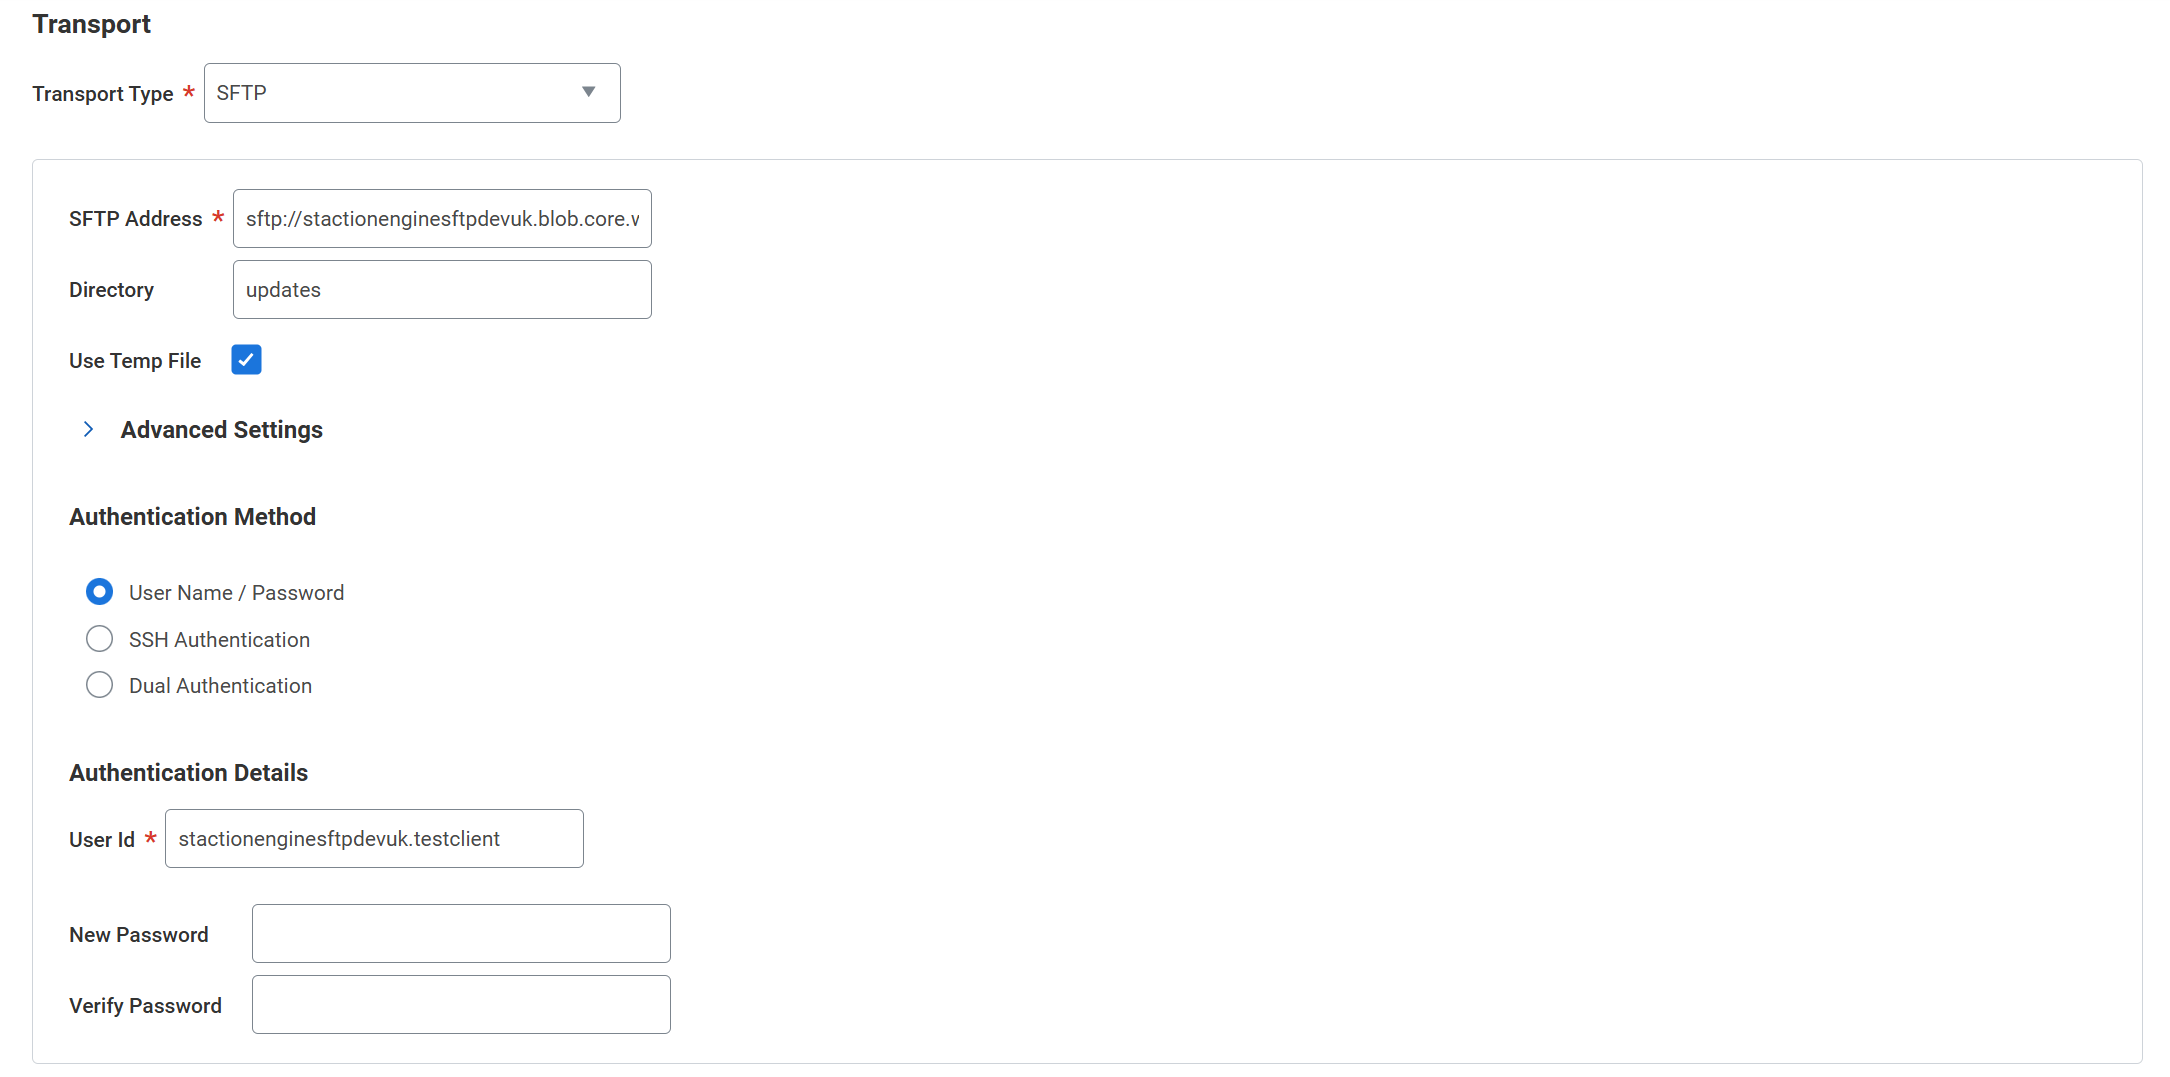
- On step 13 of the Workday documentation at Set Up Integration Retrieval, an option is available to add a retrieval method. Use the details below to connect the background core inbound service into Verifile.
- Select 'SFTP' for the Retrieval Method
- Add 'sftp://' and the sftp server that you have been provided as the SFTP address
- Add the User Id and Password provided by Verifile.
- Tick Delete After Retrieval in advanced settings.
- Set the directory and file path as shown below
Workday knowledge base includes helpful articles to assist with setting up the integration and using the Workday platform. You can access the knowledge base here. Please note that an account is needed to access the Workday platform.Ongoing Support
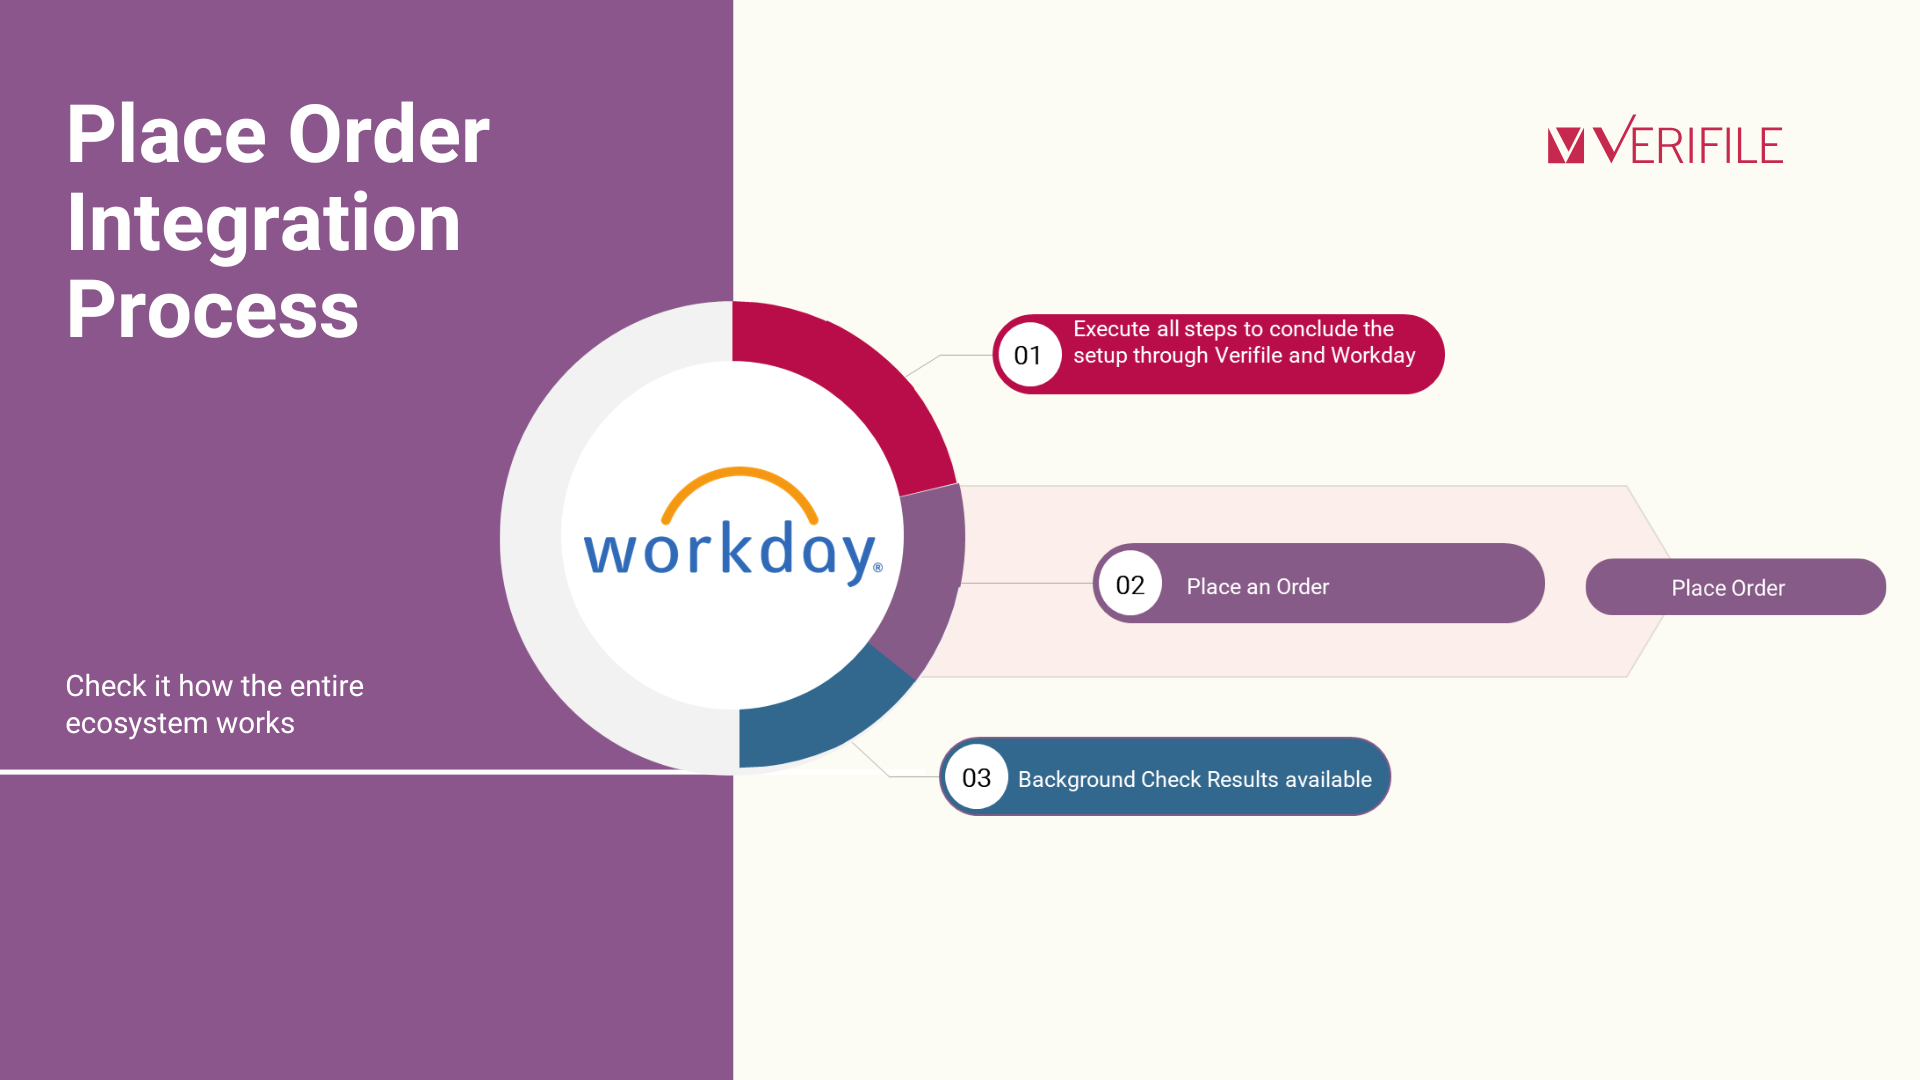
Place Order
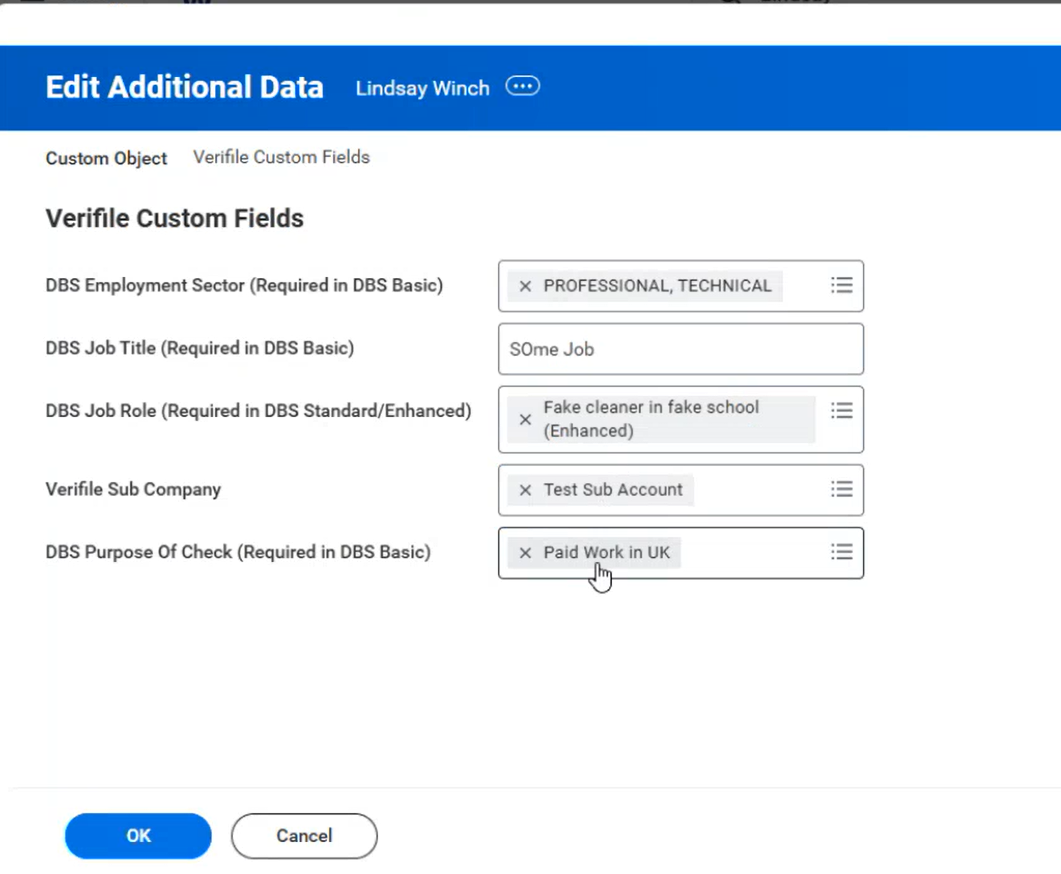
- Check the Verifile Custom Fields section and click on 'Edit' at the bottom, and make sure all fields are correct. Click 'OK' option, and then finish with 'Done' at the bottom.
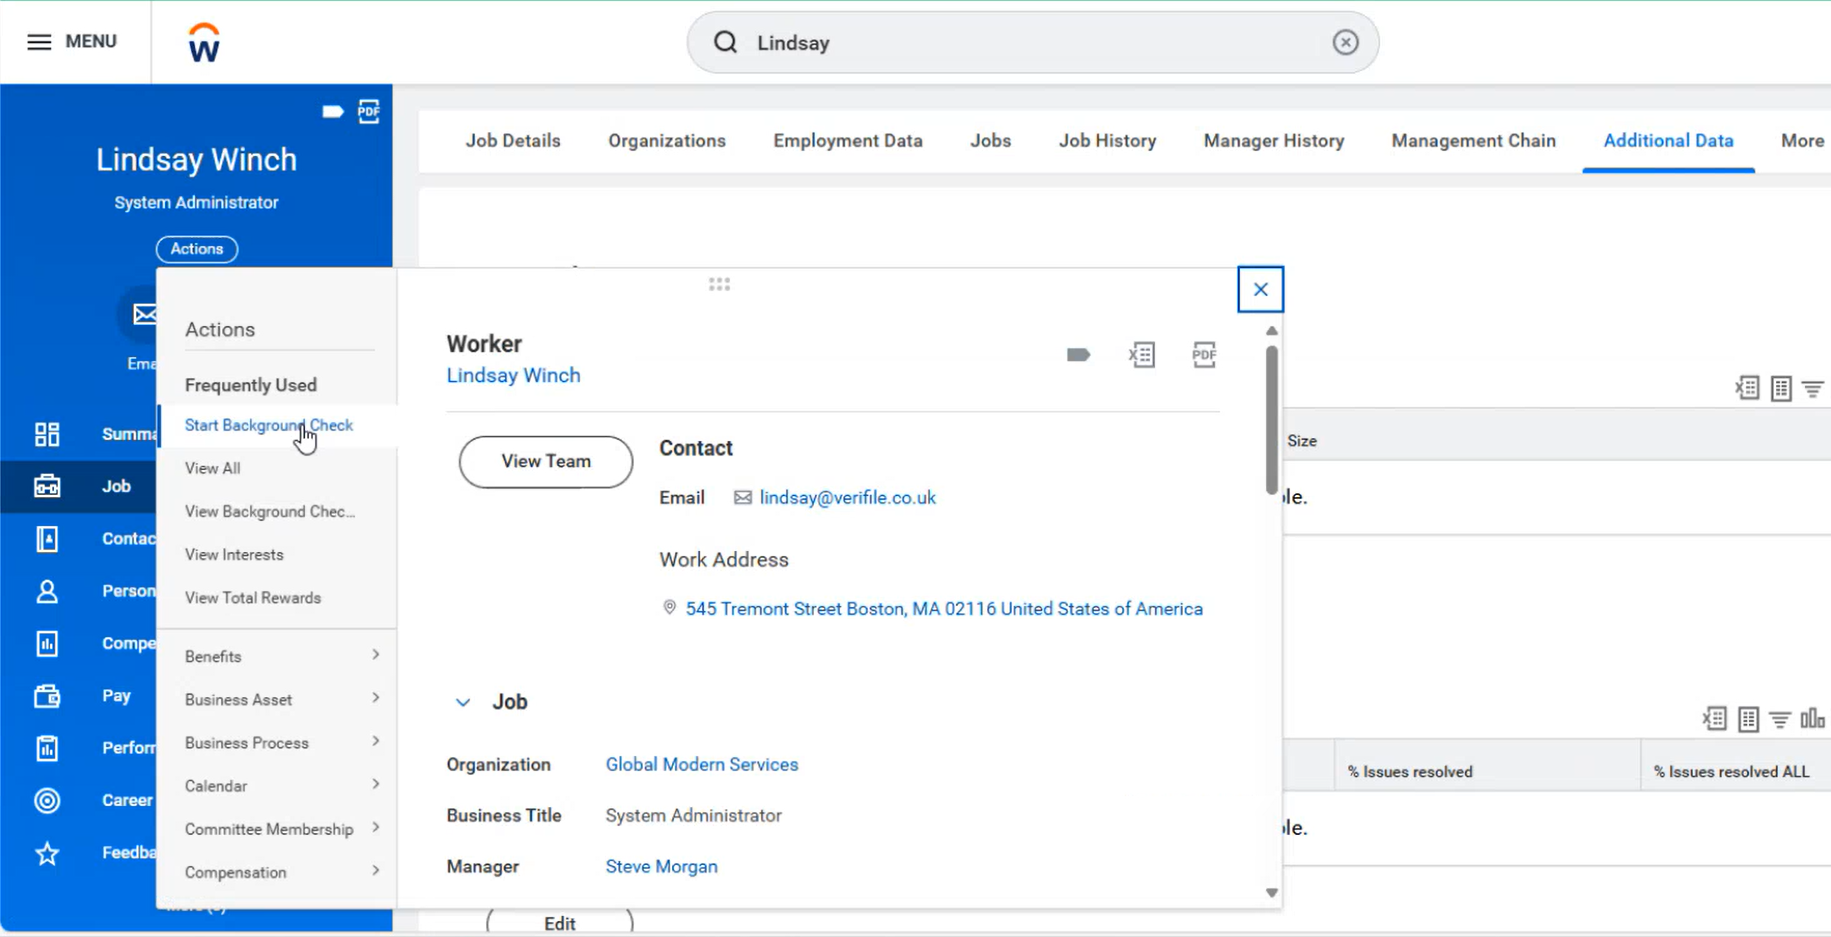
- Go back to the Candidate´s Profile, and the 'Actions' option, and select Start Background Check.
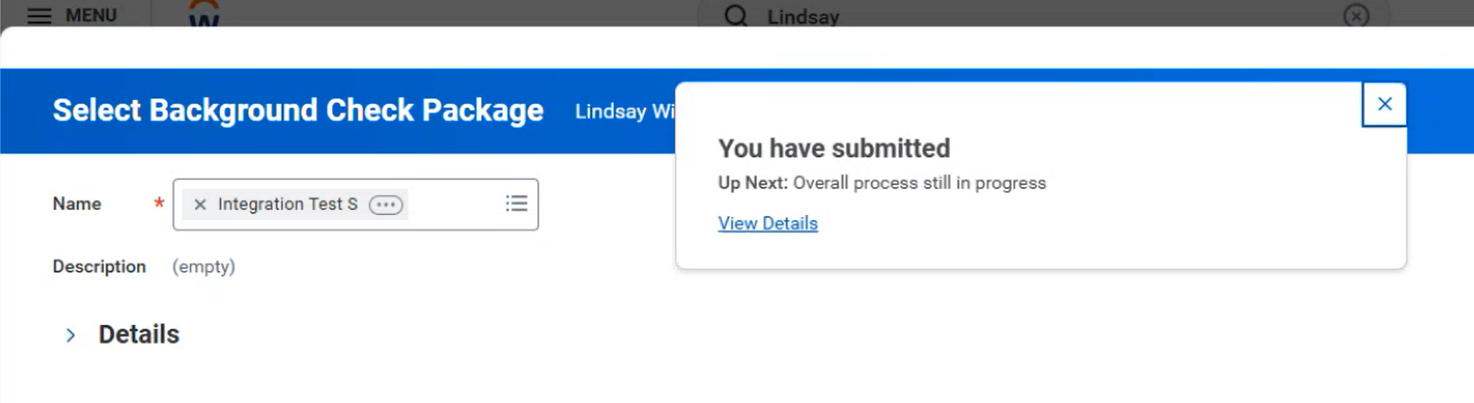
- Select the package and Submit Order.
Workday knowledge base includes helpful articles to assist with setting up the integration and using the Workday platform. You can access the knowledge base here. Please note that an account is needed to access the Workday platform.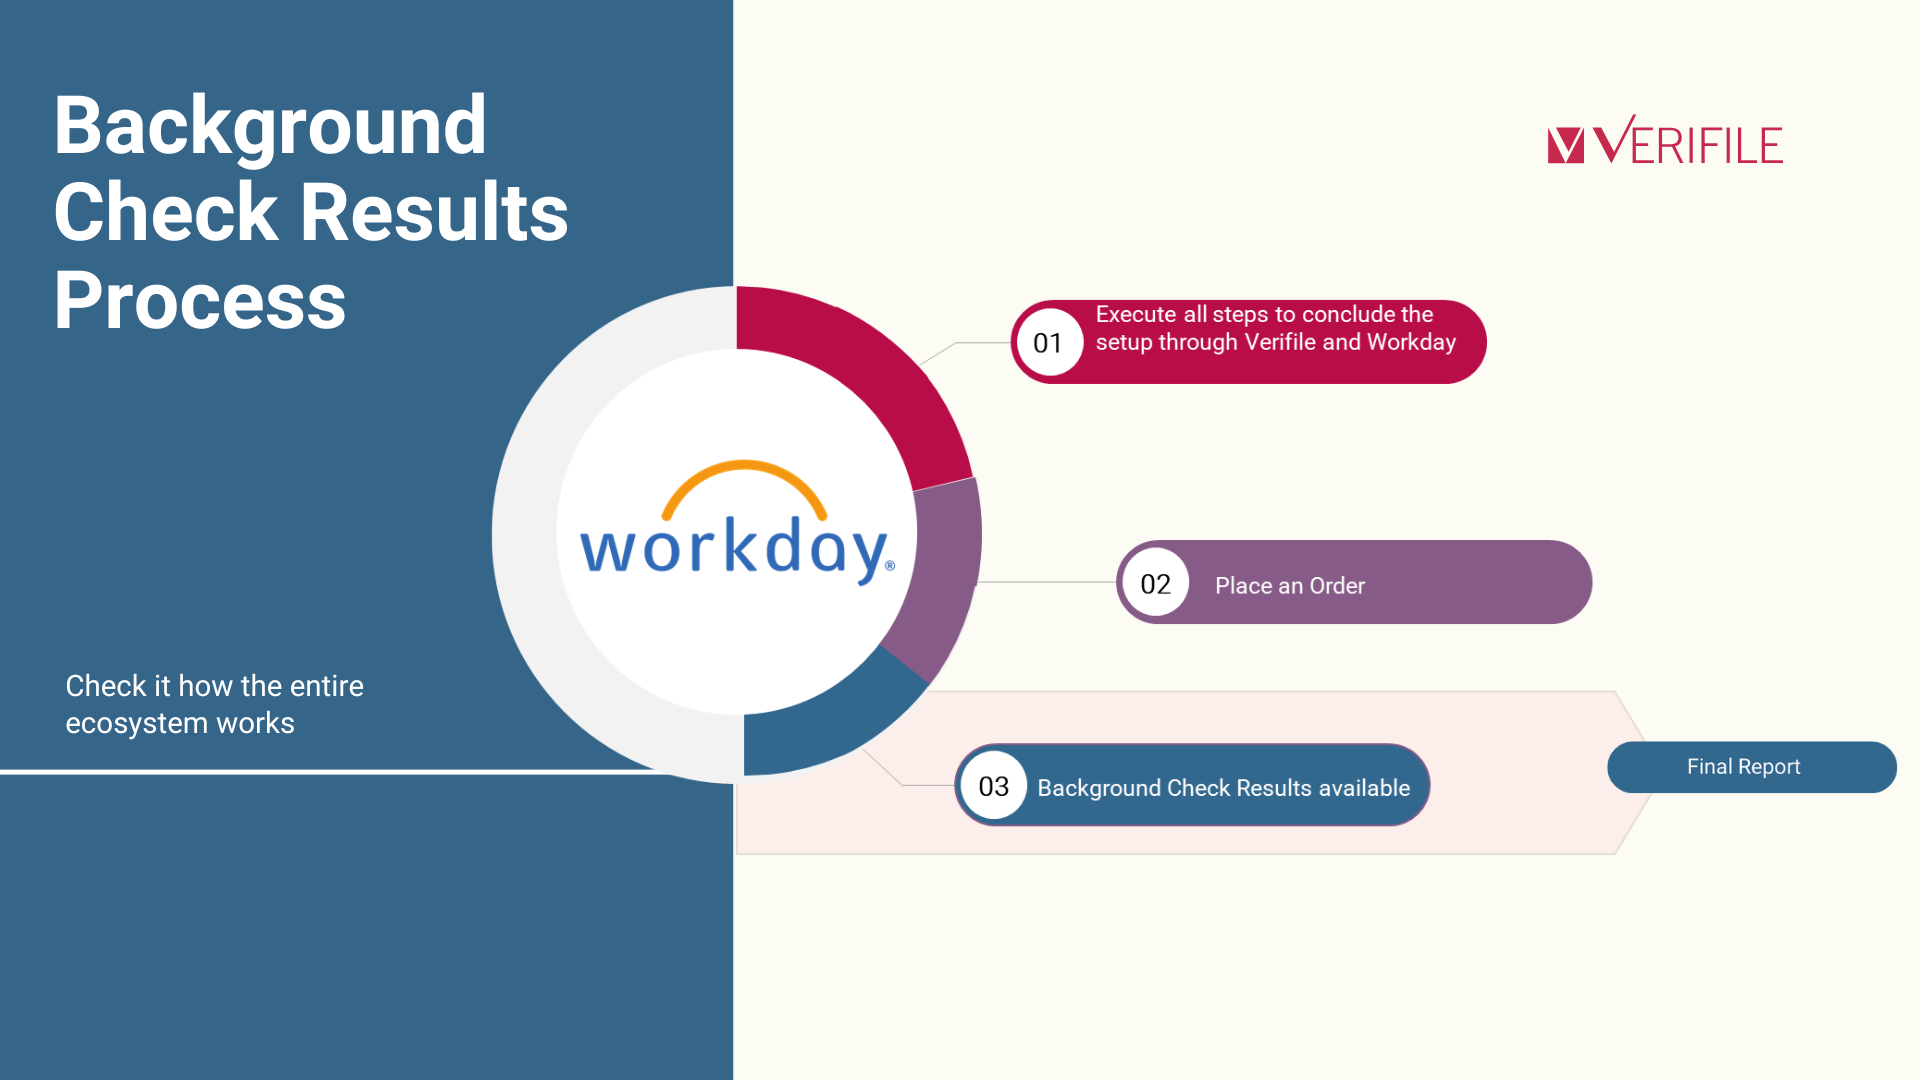
Background Check Results
Tracking Progress
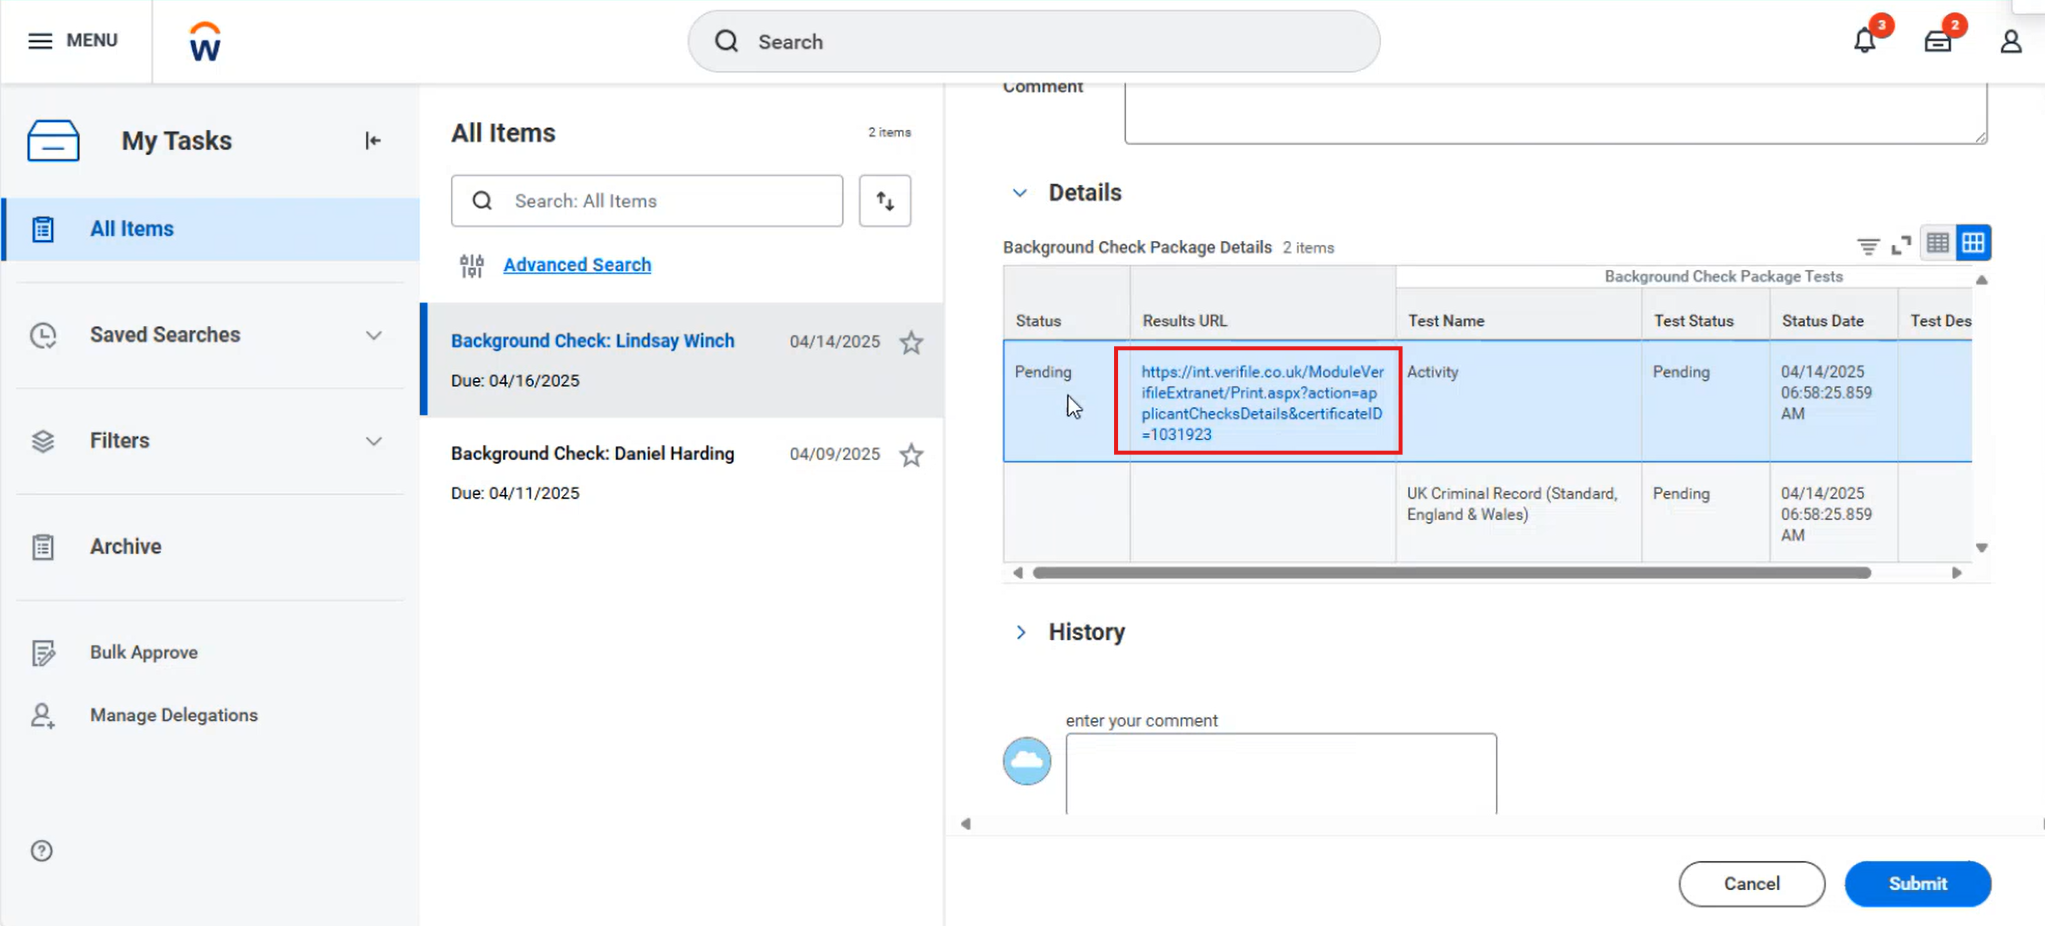
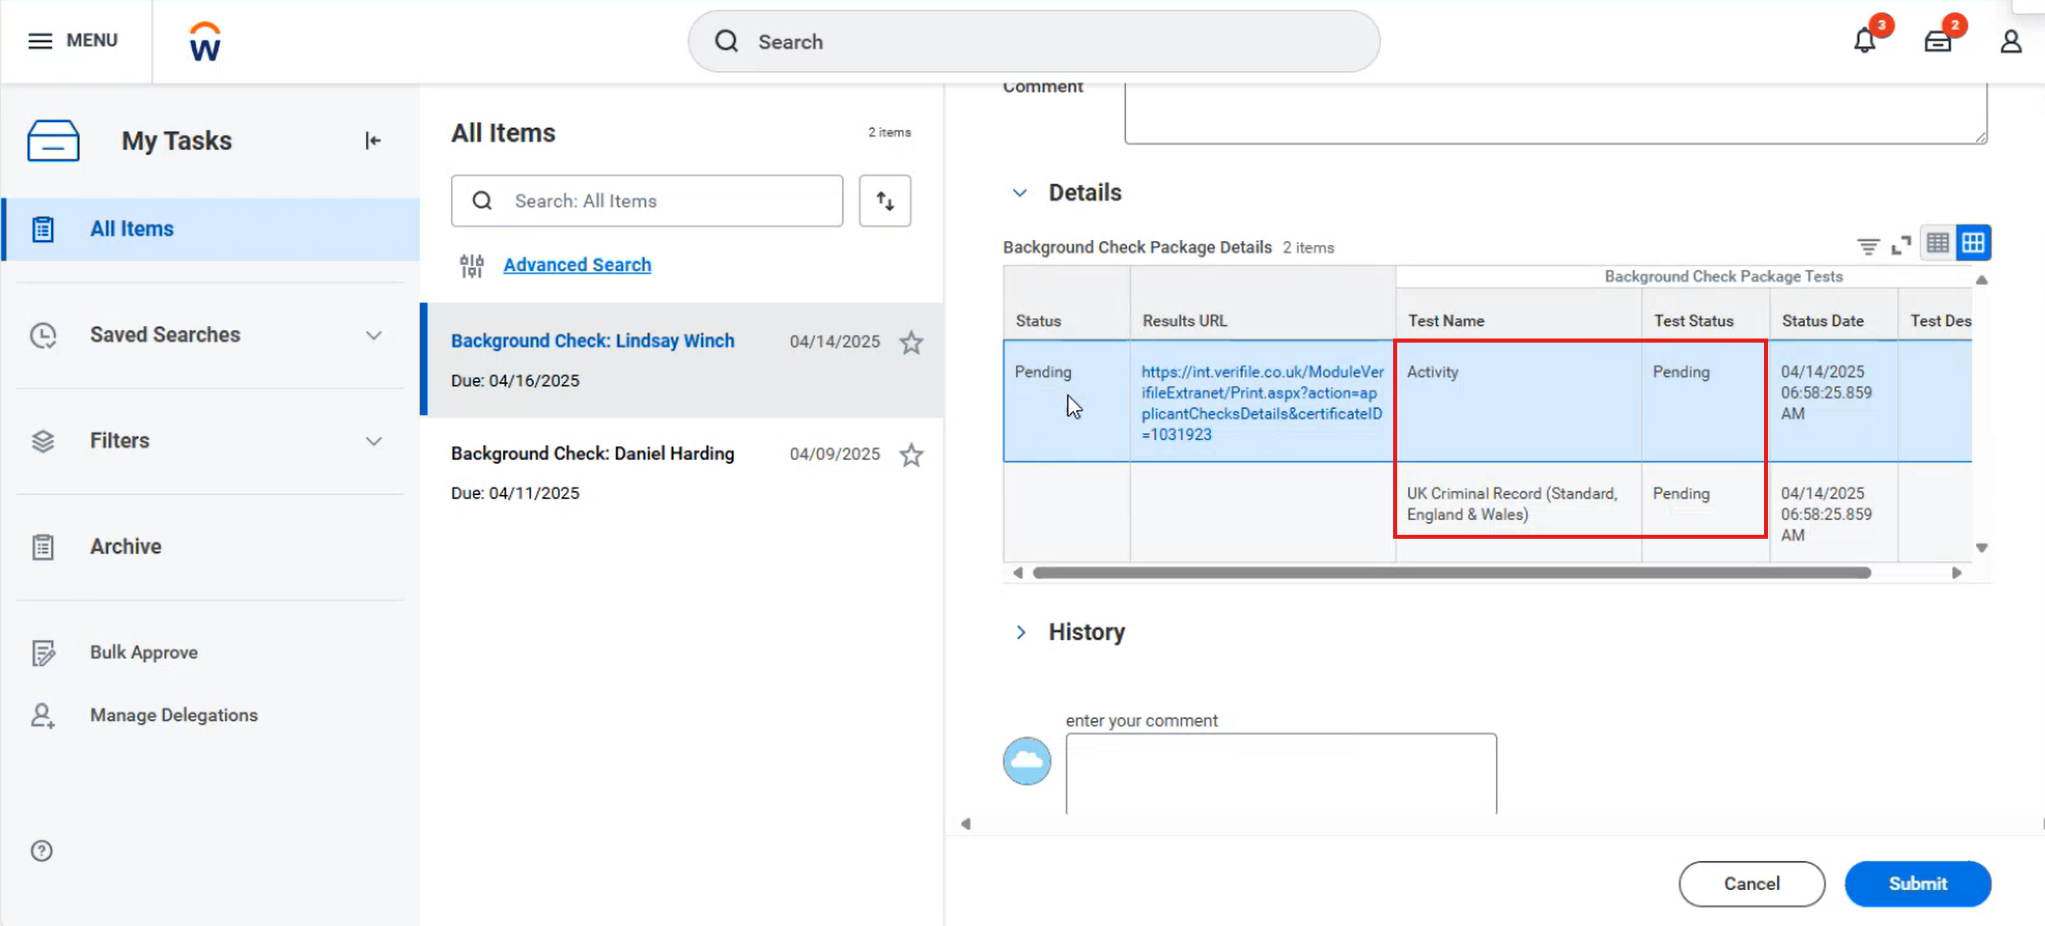
To review the updates, navigate to the Workday Dashboard, and a section called 'Awaiting Your Action' will be displayed, showing the latest background checks.
Workday | Verifile |
Pending | Awaiting candidate entry Application Information required Processing Quality Checking |
Completed | Completed |
No Longer Applies | Cancelled |
Passed | Not used by the Verifile integration. |
Did Not Pass | Not used by the Verifile integration. |
Cancel Order
Workday knowledge base includes helpful articles to assist with setting up the integration and using the Workday platform. You can access the knowledge base here. Please note that an account is needed to access the Workday platform.Need help?
Live Chat is available on the right, and you can self-serve via our Client Support Portal.
Call us at +44 (0) 1234 339 350 (Monday to Friday, 8:30 a.m. to 5:30 p.m. U.K. time).
Email service@verifile.co.uk.
We regularly update this content to ensure its accuracy and usefulness. If something doesn’t look right, click the feedback button below and let us know.
Was this article helpful?
That’s Great!
Thank you for your feedback
Sorry! We couldn't be helpful
Thank you for your feedback
Feedback sent
We appreciate your effort and will try to fix the article